https://www.youtube.com/watch?v=536C08O1AZM
How To Make A Wordpress Website For FREE 2020 _ Elementor Tutorial✅[1,800 FREE TEMPLATES]🔥
What is going on everybody ?
My name is Darryl and today I'll be showing you how to make a wordpress website step by step in just a few simple steps .
Now , I'll be completely honest with you all .
Making a website a few years ago used to be a little complicated , but today it has gotten so easy .
It's simple .
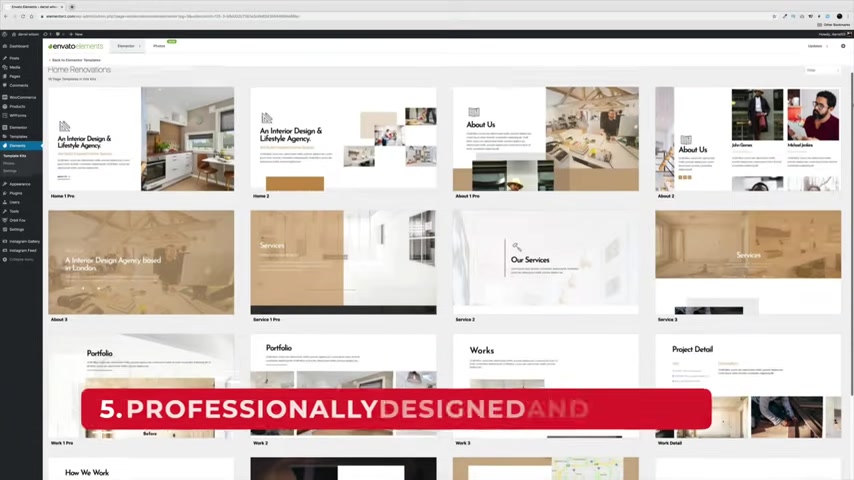
You pick your domain , you install wordpress , install your free theme and then choose from more than 1720 25 professionally made templates for your new website and then simply make any changes you want to your website , like changing the text , switching the font or color .
You can adjust the position of these columns .
You can also change the images and also move them to anywhere that you want , you can create a beautiful menu or you can add these really cool shape dividers , add a beautiful gradient background , a video background or both and then add a contact form .
So people can fill it out and it'll go directly to your email inbox .
And let's not forget , your website will be fully optimized for Mac PC , any tablet and all mobile devices .
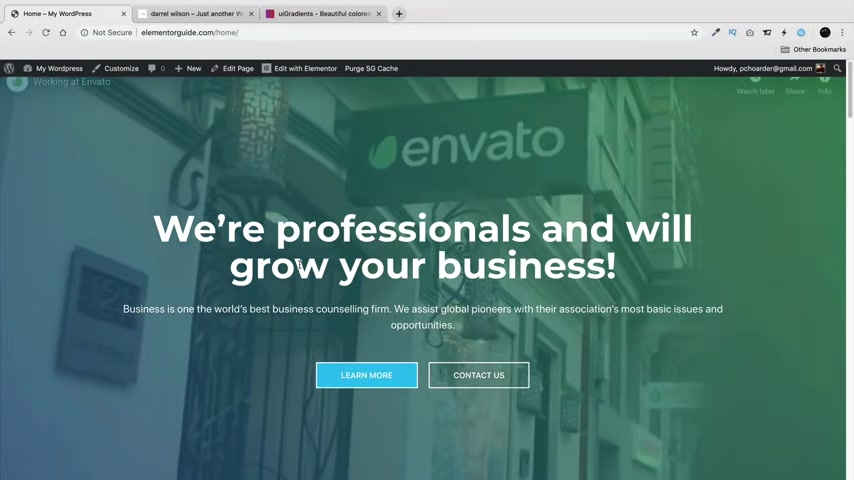
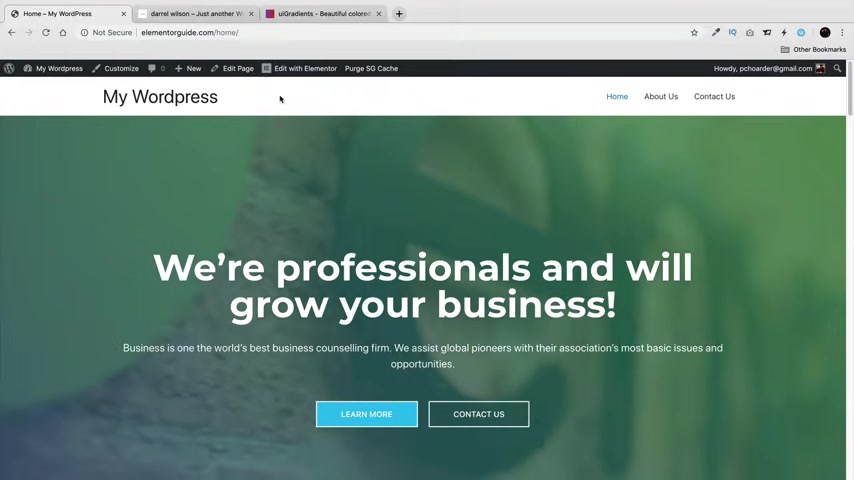
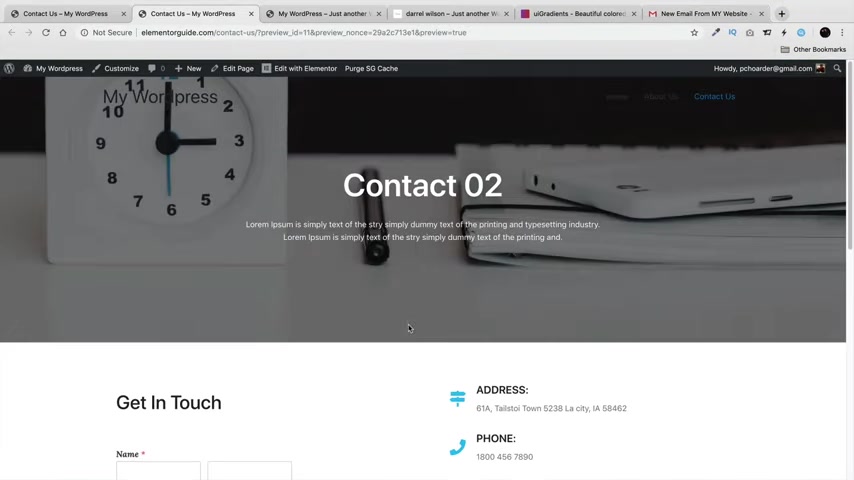
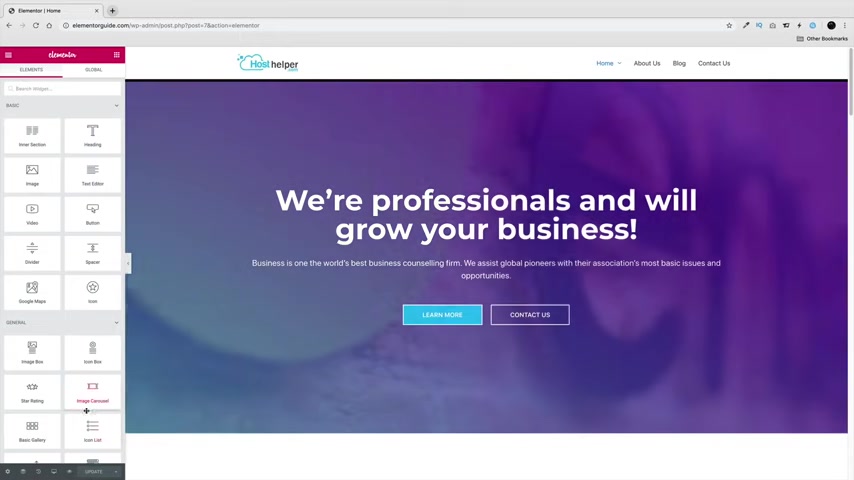
And this is the website that we are gonna make today .
And as you can see , it looks simply incredible .
We have our menu right here , our logo , this beautiful grating overlay , scrolling down right here .
You can see that it just looks like a really professionally well designed website .
So in this video , I'm not just gonna show you how to make any website to make professional and beautiful looking websites .
And don't forget , you can add as many pages as you want .
So I'll show you how you can add to your About Us page .
And also if you want your contact Us page as well , and you can easily charge someone $5000 to make this same website .
And in this video today , I'll show you how to do it today for free .
And don't worry , I'm not gonna drive a Lamborghini .
I'm not gonna sell you a course .
I'm just gonna show you today on how to make a website step by step .
Now , in case you want to know who I am , my name is Darrell Wilson .
And I used to be a full time web designer a few years ago , I switched over and now I'm a full time uh wordpress instructor here on youtube .
And many of my viewers have watched these tutorials and made a website for their business .
In fact , other ones have actually even started their own web design business watching these same videos .
So if you're ready to learn how to make websites that are professional , that look great that are mobile responsive and just really look nice today in this video , I'm gonna show you how to do it today .
Step by step .
So let's go to the first step , which is getting your domain .
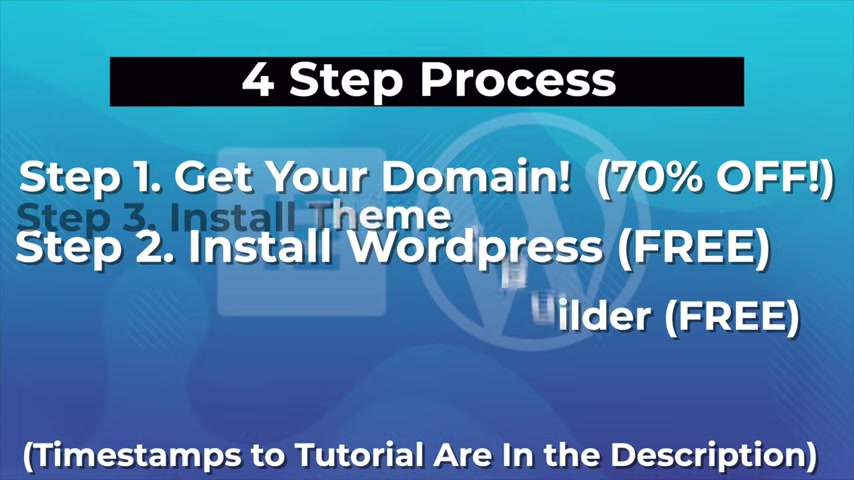
So we're going to do this in four simple steps .
Step one is we are going to get your domain and hosting .
So for example , your website dot com .
Step two is we're going to install wordpress .
Step three is we're going to install our theme and our free page builder so we can import our free templates .
And step four is I'm going to show you how to make your website look amazing .
Now , there is a link in the description of this video .
It'll take you to a page that looks just like this right here and this is dot com .
Now , I've been through many web hosting companies , host gator , blue host and hands down cy is the best .
It's the fastest .
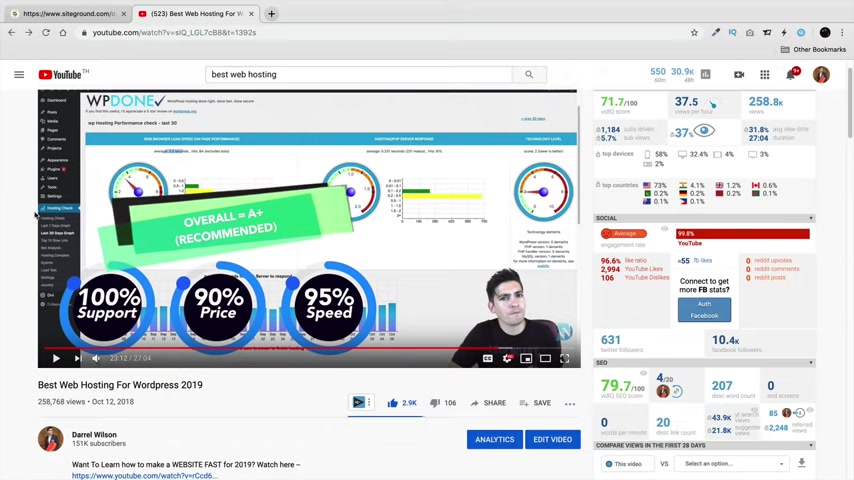
It also has the best up time as well and I even tested them against 15 other web posting companies for three months .
And SROM came up as number one as the fastest and the most reliable with 24 hour customer support and even a 30 day money back guarantee .
So you can be searching that this is the ultimate and the best web hosting company to choose from .
Now , there's three plans right here .
So we have the grow big , the startup and the grow geek .
Now , in all my videos , I recommend the grow big option because with the grow big option , you can host unlimited websites rather than just a single website , right ?
And personally if you're just getting started out , I don't think you need the go geek just yet and remember , you can always upgrade later .
So right here under the grow Big , click on get plan Now we're going to register your domain name .
So get a coffee .
Do what you gotta do to think about your new website .
So right here , I'll just do something like element or guide element or guide dot com and I'll click on proceed .

So remember this is your website address .
So this is gonna be the name of your website .
So give it some thought .
All right , and right here , we're gonna go ahead and put in our account information .
So you put your email , your password , yada , yada , yada .
I'm sure you've all seen these uh these screens before you give them your social security number and your bank account .
I'm just kidding .
You don't do that .
So here you put in your client information , your payment information with credit card , et cetera .
Now scroll down right here and I want to talk about the hosting services .
So in all my videos , I recommend the 12 months because 12 months will give you the biggest discount .
And remember you also get a 30 day money back guarantee .
So you're really not risking anything at all in this video .
And right here for the extra services , I'm just gonna say click this right here .
The Domain Icy because if you don't click on this , people can actually see your personal information .
They're gonna send you spam , they're gonna send you Viagra , they're gonna send you sex pills all this really weird and bizarre stuff that you're gonna get in your email .
So please make sure you protect it and have the domain privacy checked .
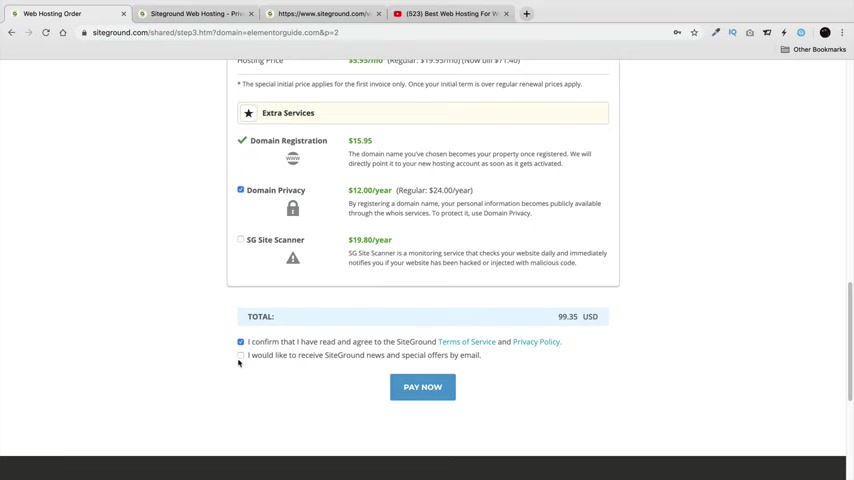
And once you're done with that , you'll scroll down , you'll click on .
I have confirm I have read and agreed to the Syron terms .
I'm sure you're all gonna read this right here and also this right here , right ?
So I'll just look the other way while you guys do that .
And if you want to receive emails from cy ground , you can check this box right here .
And once you're done filling in all your information , you'll click on pay now and I will meet you on the very next page .
All right , cool .
So I signed up for my hosting package now .
Right here .
You'll click on , proceed to customer area right now .
They're basically getting our web hosting account set up for us right here .
You can see we have set up sites .
So click on set up site now , right here , we have the option to start a new website and migrate to websites and right here under start a new website , we'll click on select right here and choose the application .
So right now we're gonna use wordpress .
So click on select now right here .
Make sure you enter in your email and a password .
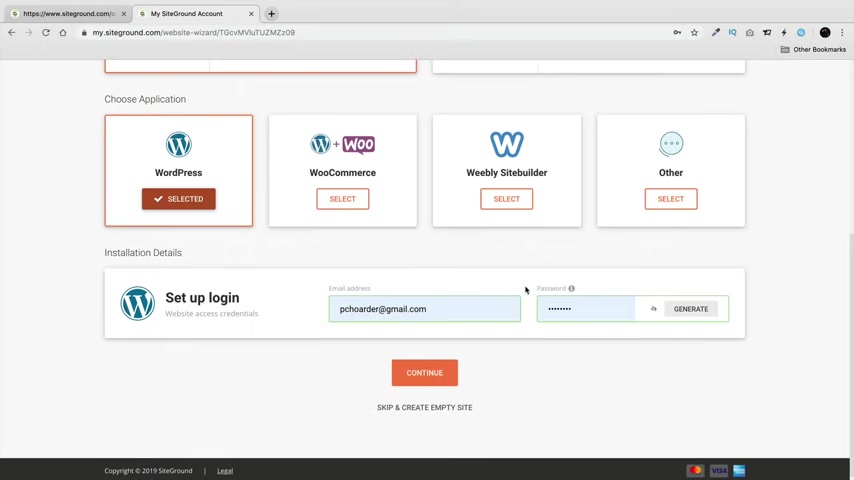
Now , this is actually to log in and make changes to your website .
So later on when we build our website and you want to log back in and kind of change stuff and modify stuff , make sure you write this down so you don't forget it .
So once you put in your email and your password , you'll click on .
Continue right here .
Now , they're offering another service .
But for right now , I'm just gonna decline it .
You can always get it .
I have this on my website schrom site scanner .
It will basically scan your website every single day to see if anyone's like , put anything like malicious code or anything .
But um for people getting started , you probably don't need that right now .
So right here , click on finish now .
Right now .
S is actually setting up your website and it's installing wordpress onto your domain .
So we can build our website also while you're waiting .
Go ahead and let me know what kind of website you're building .
If you're building a website for your friend or for your business , I'm always interested to hear what people are building with these tutorials .
All right .
Cool .
So our website has been created .
So go ahead and scroll down right here and go to manage websites .
Alrighty .
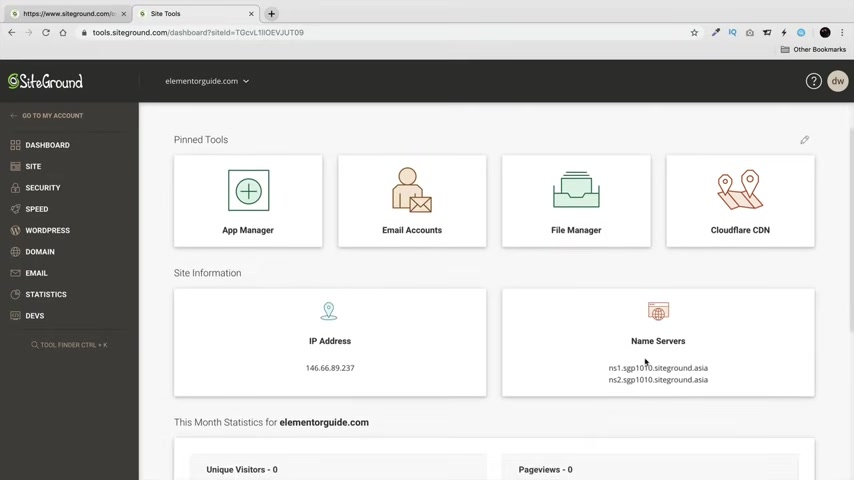
And this is basically your new dashboard .
So this is the dashboard to always do something .
And if you want information about your website , this is where you're going to get it .
So here you can make email accounts , you can see your name servers , you can see your IP address , page views and also visitors for people who are visiting your websites .
Now , on the left side right here , you'll click on wordpress and click on install and manage .
Now , scroll down right here and you should see your domain right here .
Now , we already have Wordpress installed .
So to log into your new website right here , just click on login to admin panel .
All right .
Now , right here , it's gonna ask us for like a setup wizard personally .
You don't need to do this and you can just click on exit right here and congratulations .
This is your new Wordpress website .
Your website is now live on the internet .
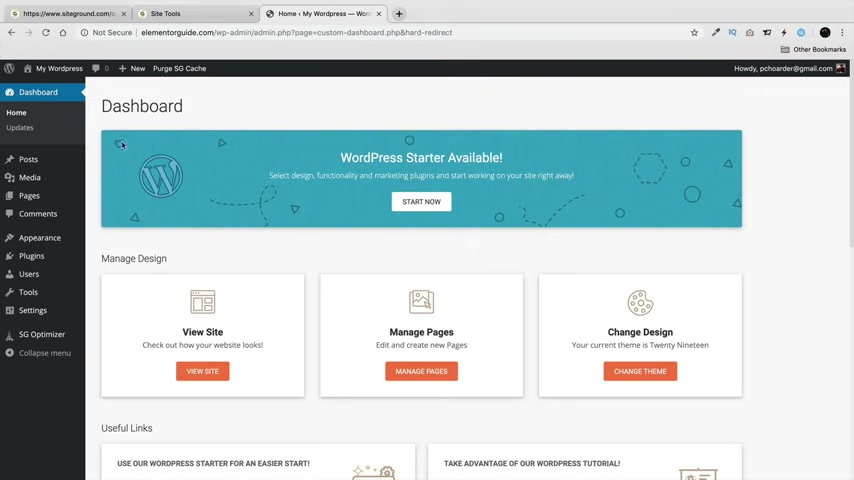
If you want to see your website , you can go over here and click on visit sites and this is now your new Wordpress websites .
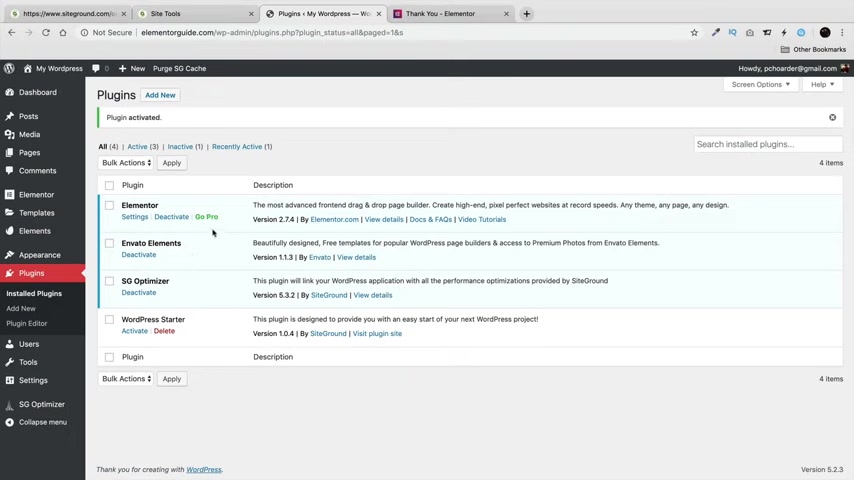
Let's go back over here and click on dashboard and let's go ahead and make some changes now to your websites now , right here under plugins , click on plugins and click on install plugins .
We don't need this plug in , installed this word press starter .
It's just basically something to like help us get started , but we don't really need this and we'll talk about what plugins are a little bit more in just a bit .
But right here , click on , deactivates .
Now , also over here under users .
If you ever want to change your , your password or your email , go to your profile right here under users .
And also right here you can kind of change the scheme of your , of how it looks .
I like midnight , I just think it looks a little bit better .
But if you want to change the email and password for your account right here under nickname , you can change this .
And then right here and in your email , you can also change this as well .
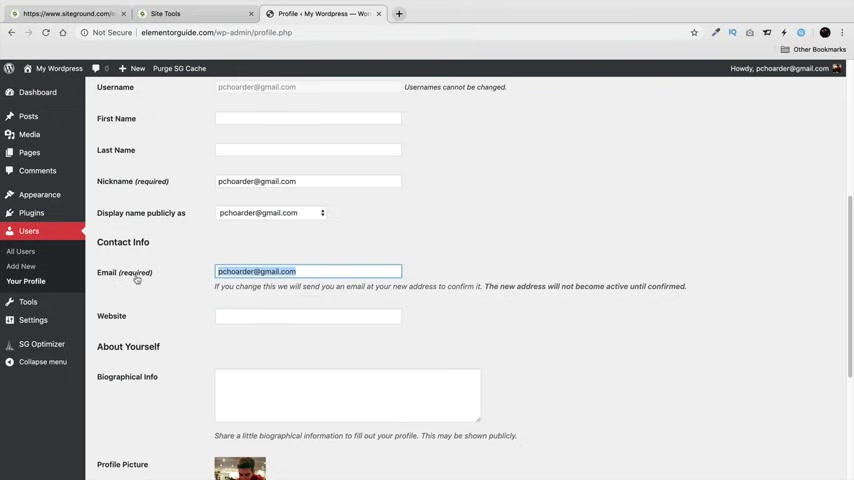
So this right here is the email where you're going to , um , if you do like forgot password , this is where it's going to go also to change your password right here , click on generate password and you can put in any password you want and then right here you'll click on update profile .
All right .
And there's one more thing we need to do before we start getting a little bit more into the , the building process right here in your settings .
We'll go to Perma links .
Now , I want you to change your Perma links right here to post name .
And the reason why we do this is because usually when you go to a website , right , you see your website dot com slash about us , right ?
Or you know your website dot com dash contact us .
Not 209-10 dash 13 , there's no reason to have all that .
So uh put it under post name and click on save changes .
All right , cool .
So once you're done with that , let's go ahead and make some pages now .
So over here in your pages , you'll click on all pages .
Now .
These are the pages that are basically created by default when you make wordpress .
So we don't need these pages .
So to delete a page right here , just click on trash .
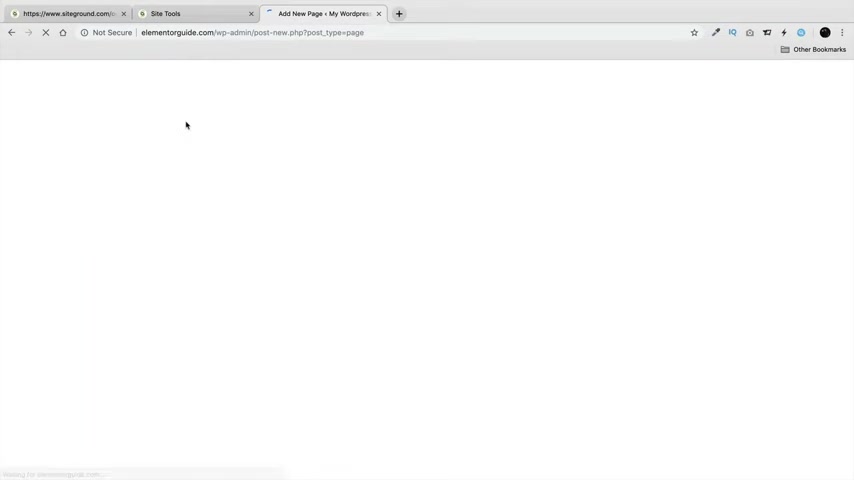
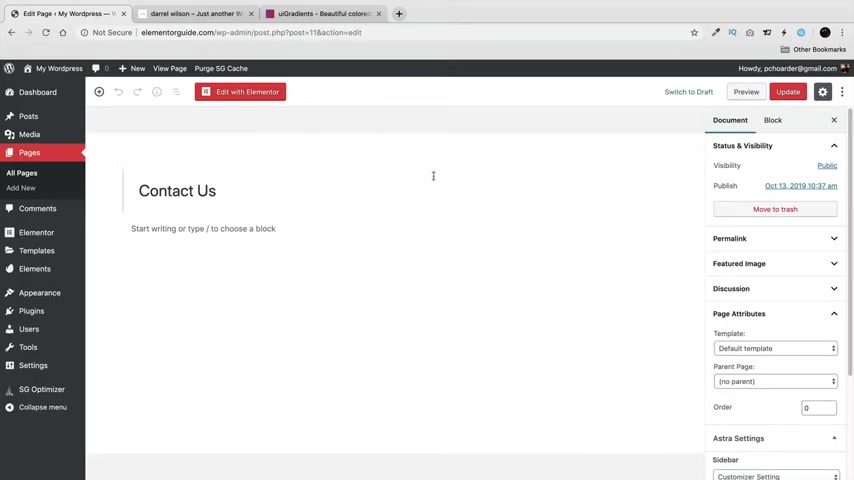
And also right here , click on trash now right here in our pages , click on add new and let's go ahead and make a home page .
So I'm gonna close this right here and under title do home right there and click on publish and publish .
Now .
Also to make another page , we can do a shortcut right here , click on plus new , click on page and then let's go ahead and do a new one .
We'll do about us , publish that page and then over here under plus new , let's do one more and let's just do the contact us page , contact us and click on publish .
And there you go now .
And if you go to our website right here , click on visit site , you'll notice that the pages aren't there .
There's nowhere for the pages to click on .
So uh let's go ahead and create a menu .
So over here under dashboard , we'll go to appearance and we'll go to menus .
Now give your menu a name right here .
So this is the primary menu .
So primary menu and click on create a menu and those pages that we just created right here .
So home about us and contact us , I'll click on add to menu and you can always rearrange this .
So I want the home page first .
I want the about us in the middle and the contact us at the end .
And I wanna make this a primary menu and click on save menu .
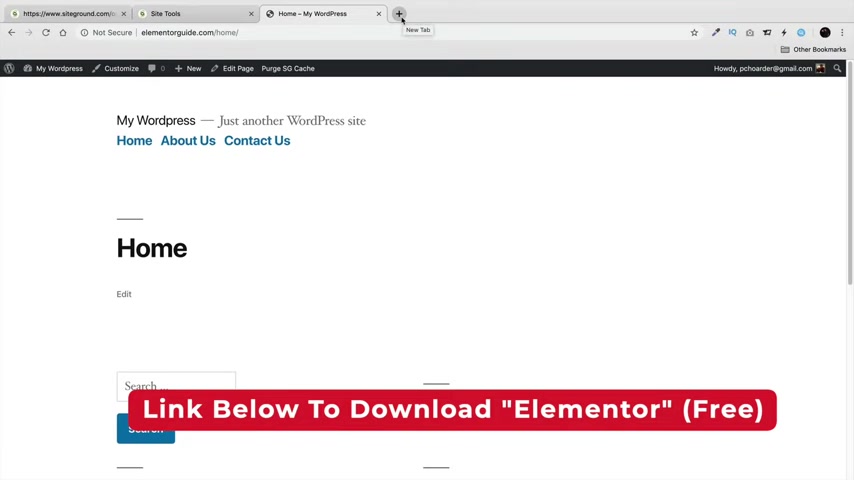
So now let's go back and check our website right here .
So visit sites and now you see we have the home page , the About Us page and the contact us page .
Now , don't worry about all this right here .
We're gonna change all this .
I know this looks , this is the default theme they use so we can make our site look way better .
So now that we've actually created a menu , let's go ahead and download the page builder .
Now , there is a link in the description of this video and it'll take you to a page you purchased .
I'm sorry to get uh element or for free for free .
So you can also get there by going to Darryl wilson dot com slash element to .
And right here you'll click on free download .

Just go ahead and put in your email address , subscribe and download and now you'll see on the bottom left , right there it is now downloading on our websites .
There we go .
All right .
Downloading onto your computer .
All right , and go back over here , go to a dashboard .
Now we're going to install the page builder .
So this is what we use to actually build the page .
So right here , click on add new now , in short , if you're completely new to plugins and you have no idea what they are .
Plugins are basically applications for your website .
So right here , just click on pop and you kind of browse around , you can kind of get an understanding .
So a contact form , this will allow you to put a contact form on your website .
Yost , this will actually help improve the seo for your websites .
This right here prevents spam .
You know , it's so you don't get a bunch of weird people asking you for stuff or trying to sell you anything .
Uh Woocommerce , this allows you to sell online .
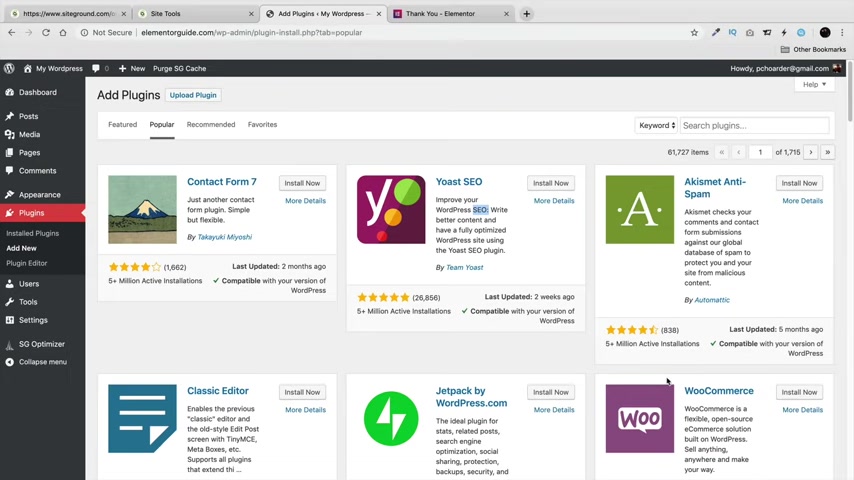
In fact , I will have a follow up video on how you can turn this website into an e-commerce website .
So make sure to check that out .
That will be in the description of this video in just a few days when I make this video .
But uh right now just click on upload , plug-in , choose the file and go ahead and select what we downloaded .
So right here , element or open and click on install now .
So now it's installing the page builder onto our websites .
All right , and right here , click on activate plug in and I'll go ahead and close this .
Now , there's one more plug in .
I want you to install really quickly .
So let's go back over here to plugins and click on add new .
And right here , let's type in in vato in vato just like that en va to .
And this is the plug in .
We're going to install right here .
It's called in elements , photos and elements or templates .
We'll click on install now .
Now , what this is what we're installing is these are the templates .
These are what 1700 plus templates that you can use and we can uh modify with the page builder .
So it's basically a big template pack with tons of just amazing free uh web uh templates that we can use for our website .
So now that we've installed the page builder , let's install a theme for our website .
So right here in our appearance , go to themes and click on add new now in shorts , how wordpress kind of works is you can kind of see here how there's different kind of schemes and styles for your website .
So every theme has a different function , but we're gonna be using only the best theme .
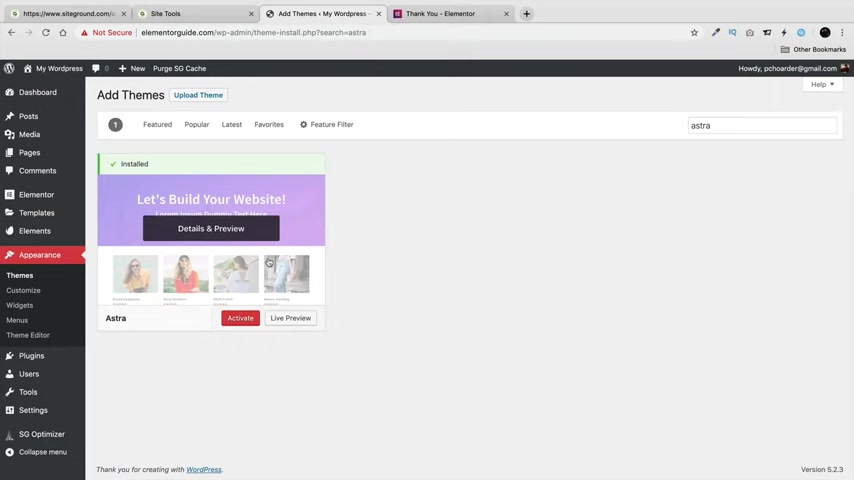
So right here under popular , go ahead and scroll down and you're gonna find Astra right here .
You can also get there right here by going to search themes and typing in Astra and right here , click on install now , Astra has the most active installs .
It's also a free theme and also has just tons of amazing reviews , tons of features for our website that won't restrict us .
So , I mean , it has like transparent menu .
It has a bunch of features that we can add to our website .
Now , once you've uh installed it right here , click on activate .
All right .
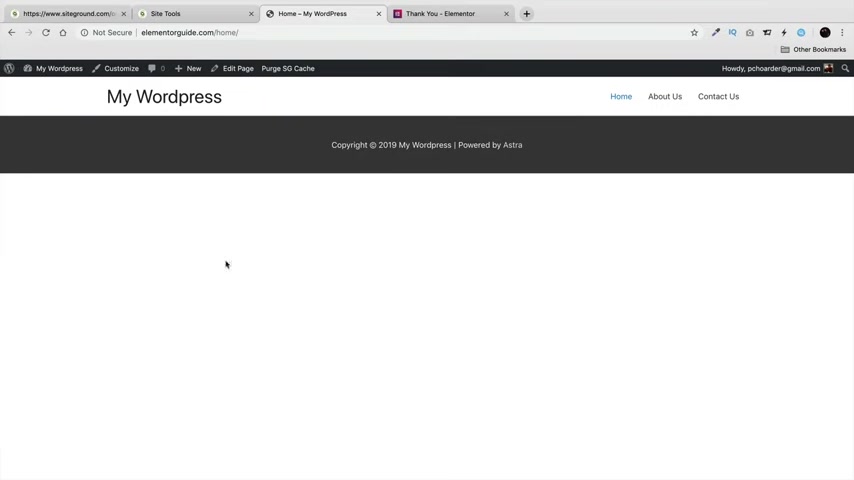
And right here it says new theme , activated , visit sites .
So I'll click on visit sites and you can see now how the sites kind of change , you know , it looks very different .
And what we wanna do here is we want to go ahead and build our website right here .
So click on your home page right now , go to home and we're now going to create our websites with this first home page .
So right here , click on edit page now , on the right side , right here you notice we have these different options .
So for the sidebar , I don't want a sidebar , right ?
And I want the content full width , right ?
I want it to extend all the way and I want to disable the title , meaning I don't want the home to show when we build our website .
So I just kind of want a blank sheet so we can build our website .
So right here , I'll click on update and also you click on view the page if you want to see your site and you're gonna see everything is completely gone , right ?
So go back to edit page and now we can build the website with element .
So right up here , which is edit with Element to click right there .
All right , cool .
So now we can start building the website .
So for example , right here , how this works in a nutshell is , let's say , for instance , you want to drag something over here .
Let's just say I want to take my heading , I'll drag it right there .
Uh Click back here , we'll take some text .
I'll just put it right there and you see where that bar is .
Now , that's where we can kind of put stuff .
I'll click back here .
I'll just drag in a button , et cetera like that .
But uh go ahead and close this really quickly .
So a better way to do that is to click on the plus icon and click on this row , which will create a row here .
I'll go ahead and say , all right , I want some heading texts and right here we can center it and let's just say you want to change like the size of it or the style right here in your style .
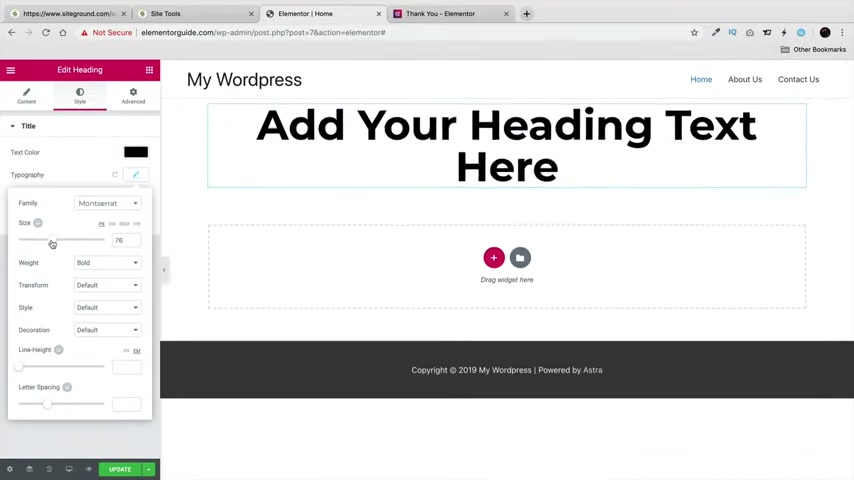
You'll click on that and under topography , you can change the font and everything .
So right here you want this font or this font , et cetera .
I like monster rats .
I think Monts are really good .
A really good um A font for the weights , I'll change that to bold and for the text color .
I want it to be black and we can also change the size of this as well .
So uh over here in a topography on the size , we can just drag this to be as big as we want it like that or as small .
Now , also what we can do here is add spacing .
But uh before we talk about margin and spacing , let's go ahead and add in some more elements right here .
So under this text editor , I want to take this and drag that right here under the style , I want to center this and now I want to add a button .
So right here , take a button and just go ahead and put this there .
And right here , I'll click on this and I want to center align this and I want a black button , you know , I want it to be black right really quick .
Now , right now , I'm just giving you all a crash course , you know , right now , I'm just kind of showing you the options , showing you how to build stuff .
We'll be using templates and everything in just a bit .
But I wanna make sure you kind of understand how to use the builder before we just jump into the templates , right ?
So uh right here under this section right here , this right here actually controls this section right here .
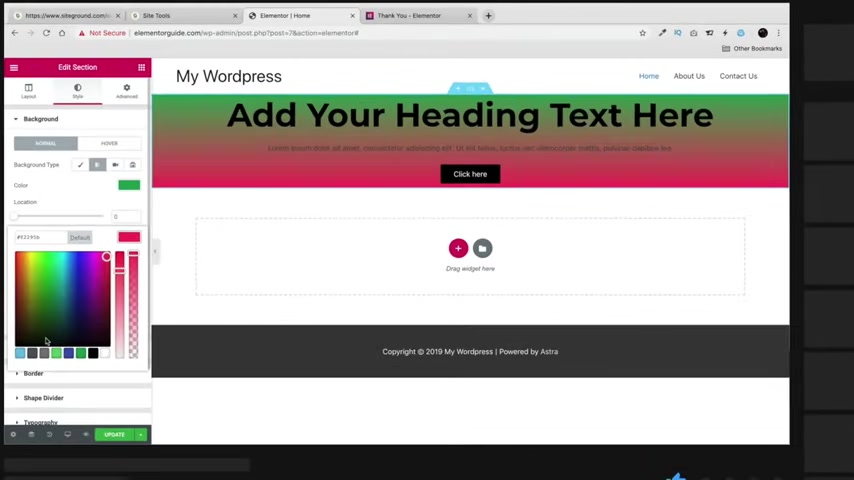
So if you want to add a background or something or you want to change something , uh This is where you're going to design it .
So for example , let's say I want to add in a background .
So style right here for background , we have classic gradients video and a slide show .
So let's say for instance , I just want to do classic and just put a simple color right here .
You can see now how this changes .
If you want to add in a gradient , you can click on gradients and now you can add two different colors like this and like this .
And then you can also kind of control the location of its , you can control the location of it , et cetera .
I'll go back over here .
I don't like gradient too much .
Our gradient works .
But you have to be really careful , you know , it's it looks nice in the beginning , but it's actually really hard to carry it out throughout your website .
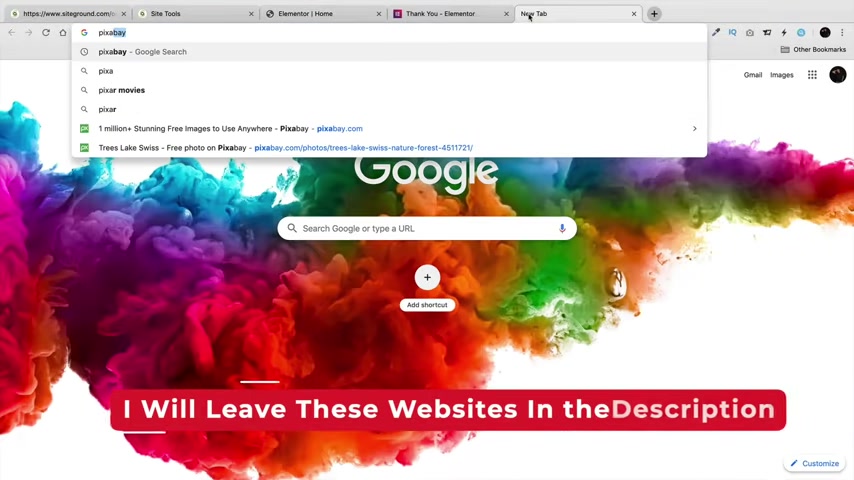
Uh Also right here , you can go to image and click on , choose an image and upload an image .
Now a great place to go get images is Pixie Bay and also uns dot com .
So Pix A bay pix bay dot com and also uns dot com .
These are great websites to choose from .
And um you can basically get any sort of , you know , image that you want for your websites .
Now , once you download one of these images , let's say you want to download something like this right here or you can click on download free and download it , you can go to this website right here called reduce images dot com .
And this will actually reduce the size of it .
So make sure your site loads really fast and everything by kind of minimizing these images .
So right here , just click on upload image , you'll go ahead and just put in the image that you downloaded and then you'll go ahead and make sure that the image is smaller .
It'll reduce the size of the image to make sure your site's running much faster .
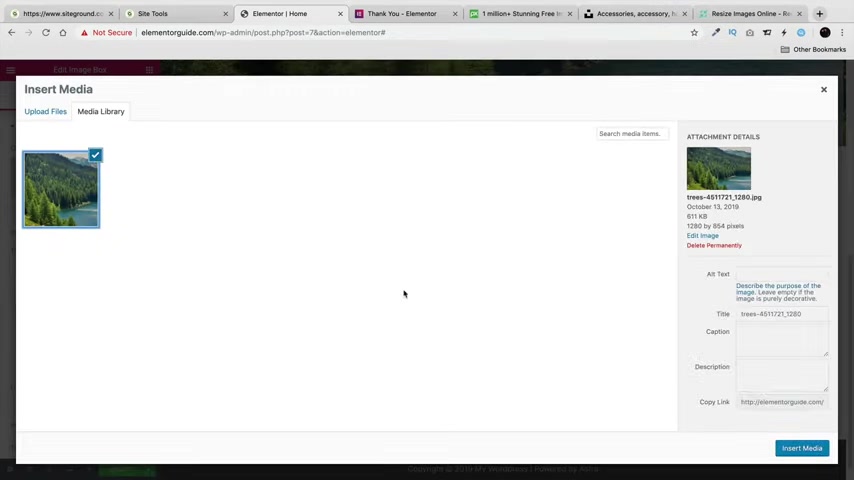
So let's go back to our website really quickly .
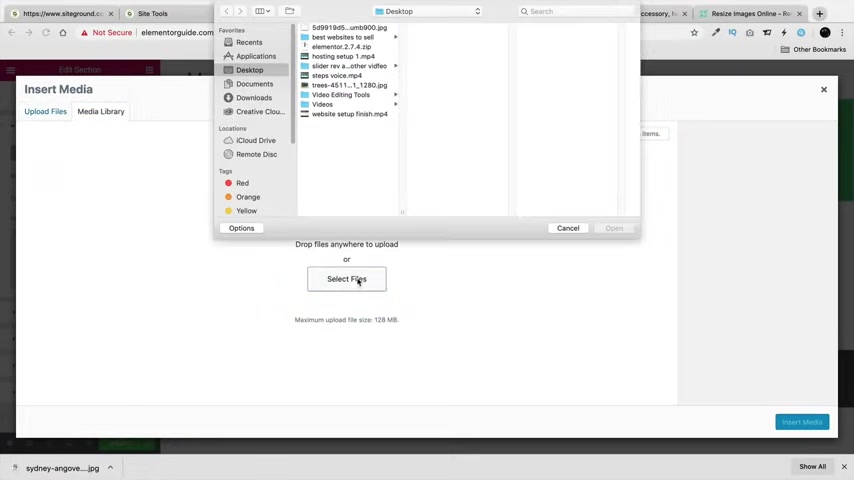
And right here underneath the library , I'll click on select file and I'll just select the image that I'll use right here and click on insert media .
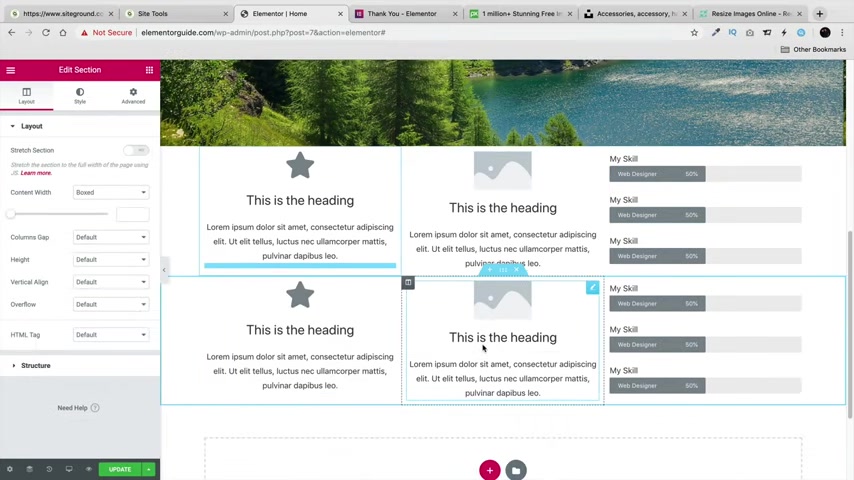
Now , I want this to extend all the way across the screen .
So right here under layouts , we have height right here .
I want this to fit to the screen .
And now you can see right here how it now fits to the screen .
And maybe I kind of want to change the text to something like whites , right ?
So change it to whites , double , click on this style , text , color whites , et cetera .
So next , let's go ahead and scroll down right here .
And right here , I'll click on these icons .
And let's say , for example , you want to add another section , you can simply just click on this plus , let's say I want a three column row and let's go ahead and drag in some elements right here .
So I'll just simply take this icon box , put it right there , click on these again and then maybe we want something like an image box and then click on this again .
And then maybe right here , we can add in something like a video or an icon list or even a progress bar and just drag it in right there .
And let's say I want to duplicate this .
So I want more of these on the right click , I can click on duplicate , duplicate and we can even do this for the entire row .
So for example , right here , I'll click on this blue section right here and click on duplicate and it's going to duplicate the entire row for us .
So we don't have to make , you know everything from scratch again .
So uh once you actually design something right here , you can just duplicate it and then change it .
Now whenever you use a module , whenever you want to design it , you can see here , we have different options .
So uh I have a star icon right there .
But under icon library , I can change this to anything that we want .
So I'll change this to something like a a taxi .
We'll use a taxi and then under the style section , we can change the color of this to anything that we want right there .
So uh black , we can change the spacing , we can change the size and we can also even rotate it .
Oh like that over here , we can choose an image .
So if you have an image that you want to use , you can go ahead and just put in the image right there , you can change the title , you can add some description .
And also if you want to add a link right here , you can put a link which we'll talk more about links in just a little bit .
So for example , we'll probably link this to something else on our website once we actually have something for it to link to .
Right ?
So now that we've done this right here , we have this section right here .
Now that you have a basic understanding of kind of how to use the Page Buller and how to change stuff .
Let's go a step further now and let's go ahead and use some templates .
So let's go ahead and delete all this .
I'm just gonna close all this right here and I'll click on update .
Let's go back over here to exit the dashboard .
And now right here under elements , I'm gonna click right here on elements now right here .
It's saying to use our plug-in , you will need to accept our terms saying , OK , sure , I will agree and I will go to continue .
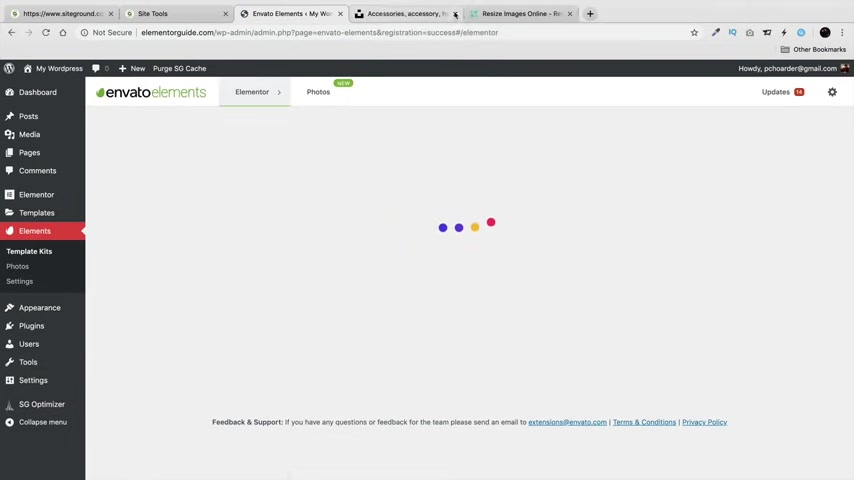
Now , what this plug-in allows us to do is to basically get these starter websites and sections that we can apply for our website .
I'm gonna go ahead and close all these tabs right here .
I don't like a lot of these tabs open .
I don't know why I have them all open right here .
So I'll just close all these tabs and let's go ahead and now find a template for your website .
So , congratulations on getting your new domain and hosting with CY ground .
Now , in this next section , I want to show you now how you can actually select the templates and import it to your wordpress website .
Let's go back to the tutorial .
So first I'm gonna close this right here and you have these different templates .
Now , these right here are premium , you have to pay for these ones .
But below this , right here , you have all these other free templates .
So right here , you have free template kits for Element or you have more than 1700 to choose from .
Now , what I want you to do first before we go into that is go over here under search , click right there , click on corporate and business .
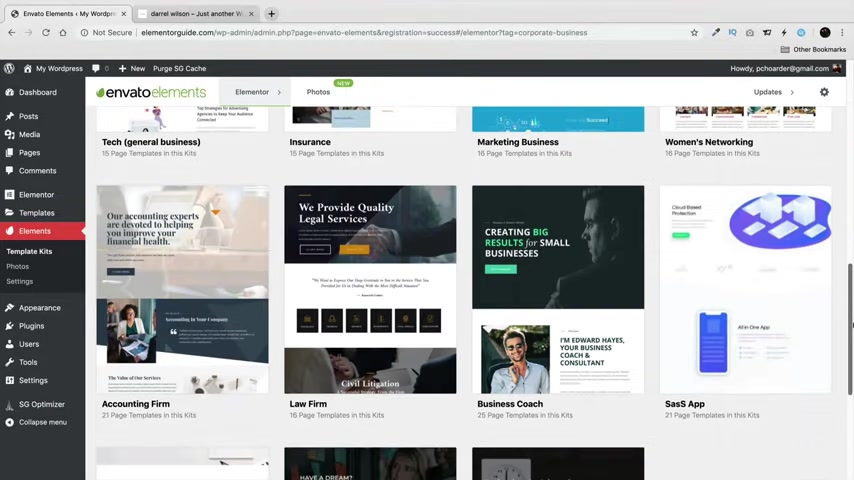
And what we're gonna do right now is I'm gonna show you how you can kind of add a gradient background , how you can change stuff , how you can rearrange icons and everything to make sure that you can kind of use this , how you wanted to look for your website .
So right here in the corporate and business , I'll scroll down right here and we have these free template kits to .
So I'll scroll down right here and the one I want to grab is this one right here , professional services .
Now , this is the one we're gonna use right here .
Home number two , click on this and click on import templates what it's doing right now .
It's actually taking this template and it's putting it inside of our elementary library which will show you how you can access that library .
So now I've done that .
Let's go ahead and go to our page .
So over here under pages , under all pages , we'll click on the home page .
So right here , we can click on view or we can click on edit element or either way gets us to the same place .
So I'll just click on edit element to now .
Right here .
You notice we have this little sign right here .
So this is right here .
We can actually um send the blocks or I'm sorry , import the blocks .
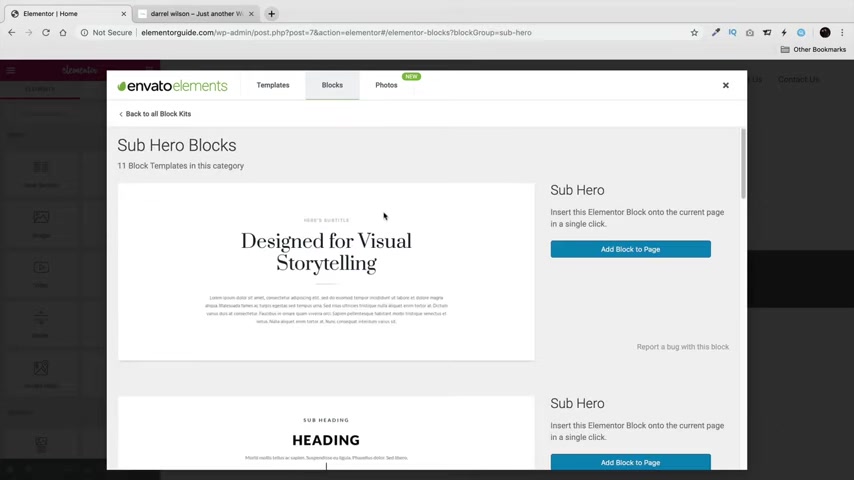
So right here , for example , we can click on blocks and let's say for instance , I want to click on sub hero and I wanna add this block to the page .
We can do that and then I'll add the block .
So you can see now how we can add blocks to our page .
Another way is right here under the template section under my templates right here .
It says professional services home too .
This is now where our templates stored and right here , I'll click on insert and click on .
Yes .
And it's now going to take that template that we imported and now it's going to put it on our website right here .
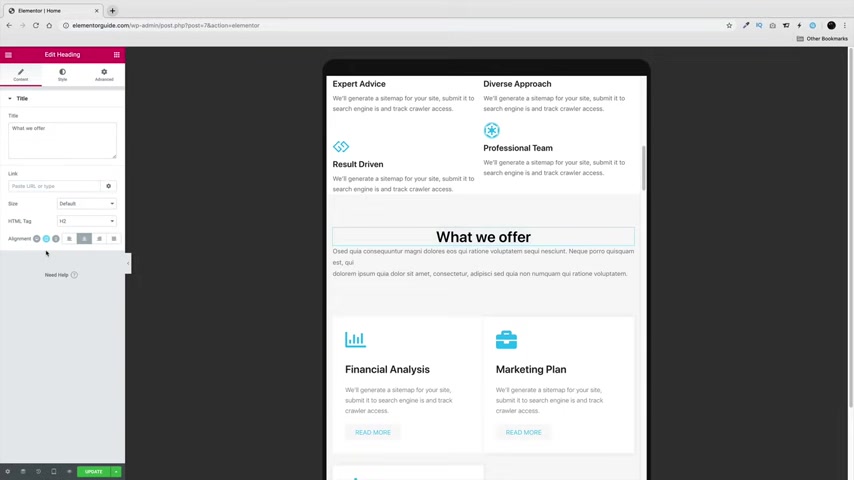
So you can see right here .
Now we have the , the website imported everything looks good , et cetera .
All right , it's going back up .
So let's go ahead and make some changes now really quickly .
Um You can see right here how we have this gradient background , how we center this text and now we have two buttons right here .
So let's go ahead and try to achieve that right now .
So right here , the first thing I wanna do is I want to add in a gradient background .
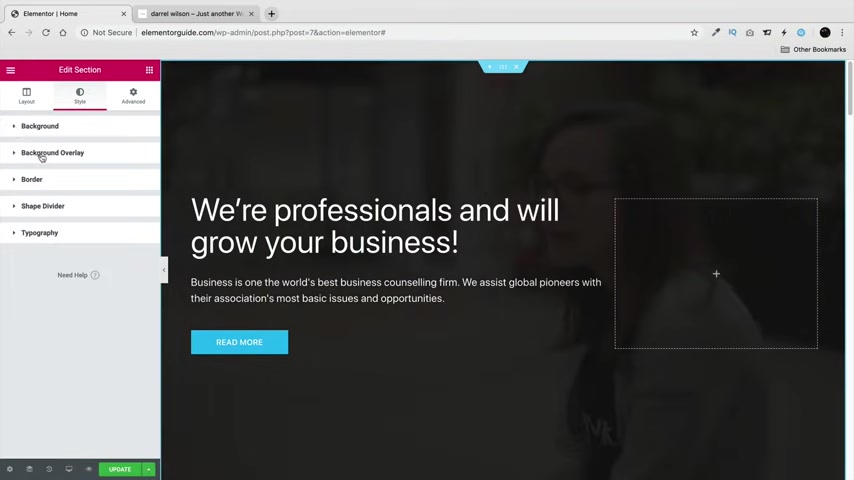
So in order to do that right here , I'll click on this little icon right here which remember controls the whole section over here under style .
We'll go ahead and and close this right here and go to background overlay .
Now , what we can do here is we can add a gradient background on top of our image or video .
So for instance , right here , I'll click on gradient and now you can see how there's a gradient color over our background .
Now , if you need help with grading colors , I recommend going to this website right here .
So just go to google dot com and just type in like a grading colors , gradient colors and UY gradients is my personal favorite because it shows you exactly what it'll look like and it'll give you the code to use .
So just go ahead and scroll through like maybe one or two or three of these .
And you can just go ahead and grab and pick one .
So this is the one I use right here .
So you can see how this gradient looks very similar to this one right here .
I just kind of reduce the opacity .

So what you'll do here is you'll just simply take this code , copy it , go back over here and for the first color , just go ahead and paste that code in there .
And then over here for the second code , I'll just go ahead and paste this one over here .
And now I can now we can see that there is now a gradient background .
And again , remember you can always change the location , you can also change the angle as well and you can also reduce the opacity of it .
So just depending on how much you want , but the ingredient actually helps people see the text .
So you don't want to really get , get rid of it because then people really , it'll look really messy .
I mean , look at this like that just looks like too much , it's too clustered , right ?
It doesn't , you can see how it's a little bit harder to read the text when there's so much moving in the back .
So I'll change this over here .
Now , let's go ahead and make it like this right here .
So what I'll do is I don't want this right here .
So all right , click and click on deletes now .
Right here .
I want to center this and I want to sort of change the text right here .
I like Monserrat , this other fonts really ugly .

You know , this is like the default font monster rats .
And I wanna make this bold and I wanna make this a little bigger same thing right here .
I'll click here , style center now .
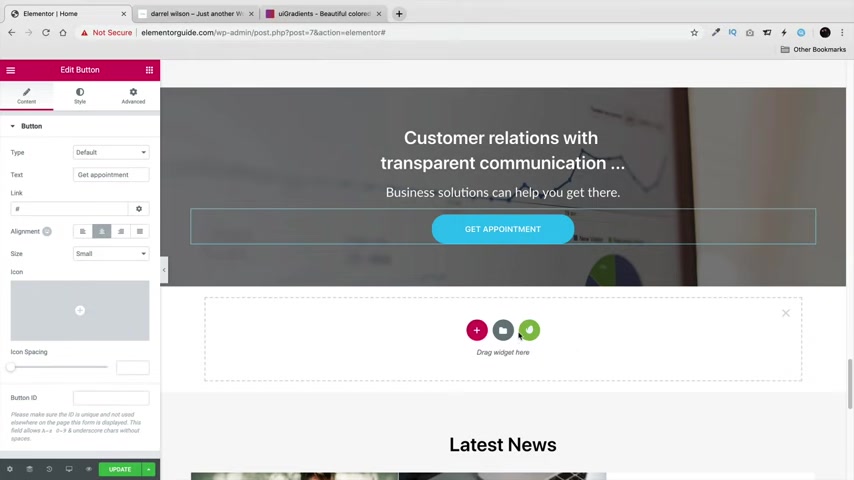
Right here .
I want to duplicate this button because we need two buttons , right ?
But I don't wanna have to make one button from scratch .
So right here , if I click over here , I can drag a button right here and then we'll have to modify this and change everything .
But I think a better way to do this is go ahead and delete this right click and duplicate it .
Now , we have two buttons .
Now over here , I want to say , all right , I want a new section with two columns .
So right here under intersection , I want to take this and I want to drag it right there .
Now , you see we have these two spaces .
So what I'll do right here is I'll take this on this blue pen and I'll go ahead and drag it in this box and take this one right here and drag it in this box right here .
Now , we need to kind of align these buttons .
So I'll click on this button right here and do alignment to the right and there you go .
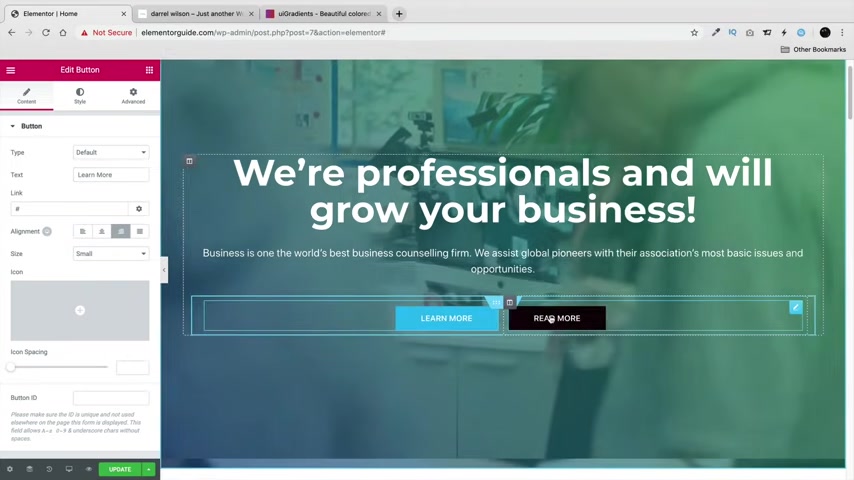
Now , maybe you want to change the text like learn more and then I'll click on this button right here and I'll do contact us and maybe I want to kind of get rid of this color .
You know , I don't want , I kind of wanna have one like , uh , you know , I , I don't know , I don't , I don't want two colors .
You know , the two colors is , it's , it's a little ugly .
So I kind of want to have a transparent background .
So right here , I'll click on this button style and the background color will go ahead and leave it as blank right now .
That actually disappeared .
So what I wanna do is I want to add a border .
So right here under border under border radius , I'll put in like I'll put in two , I'll put in solid right here .
And for the width of this border , I want around two pixels , something like that right there .
And also for this one , we should do the same thing , right ?
Because now this is a little bit bigger .
So we wanna make sure these are like the same size .
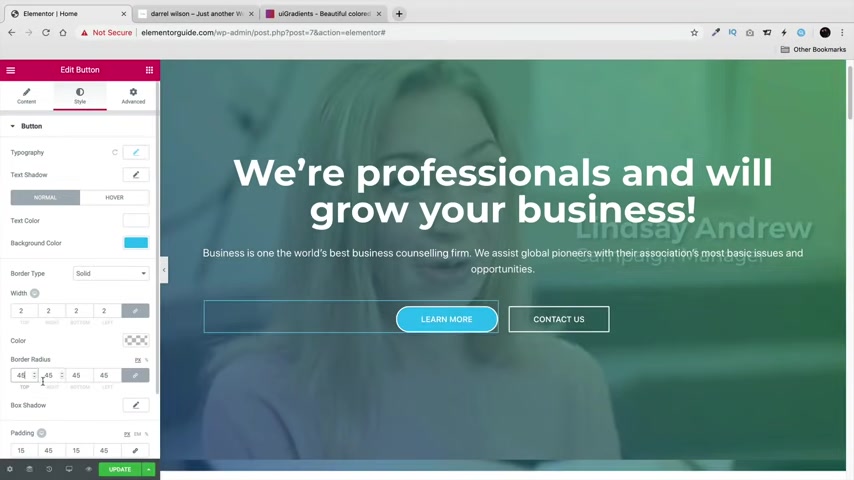
So border type solid just put in two and there you go .
And we can add some border radius .
What border radius does is that it turns it into a circle .
You see how now it's a circle and this is a square .
So the more border radius you have , it'll change it into a circle like that .
All right .
So guys , congratulations .
We have just made our home page really simple , really easy to do .
Right .
So , now that we've done this , let's go ahead and scroll down right here .
Let's make some changes .
Now , sometimes guys , when using this builder , weird stuff happens .
Like these little boxes just click on it and it'll , it'll work .
So it just does that weird stuff .
I , I don't know .
You know , I'm not , I don't know why it does that stuff .
I , I don't know why .
Now if you want to change something um or modify something , just simply take this , drag it over here right here , we can change the text to uh result based , results , result driven and now we can kind of modify everything .
So now you can understand how we change stuff .
Now , this one right here is called the divider .
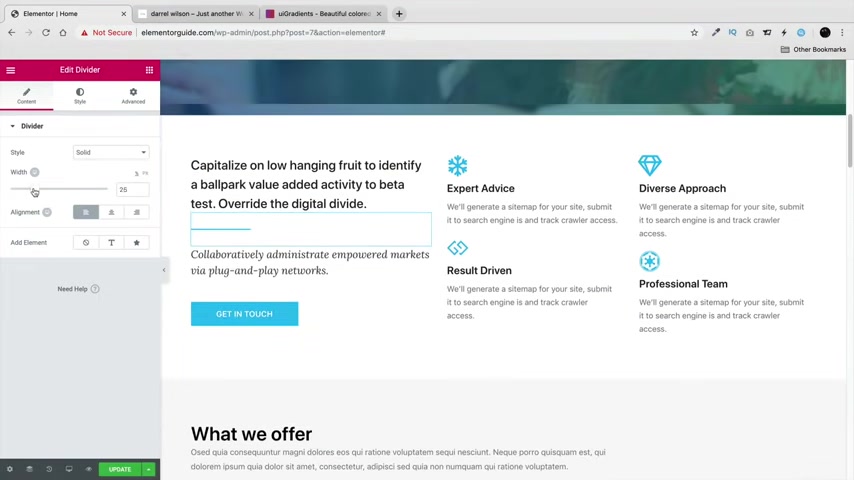
We didn't really talk about this too much , but what a divider does is that it adds space .
So for example , right here we can take this with and then let's say , for instance , I want to say , you know what I wanna put it in the center , make a little bit better .
And also right here we have this style which you can control the weights and also the gap as well .
So you see now how it's creating space .
All right , you see that .
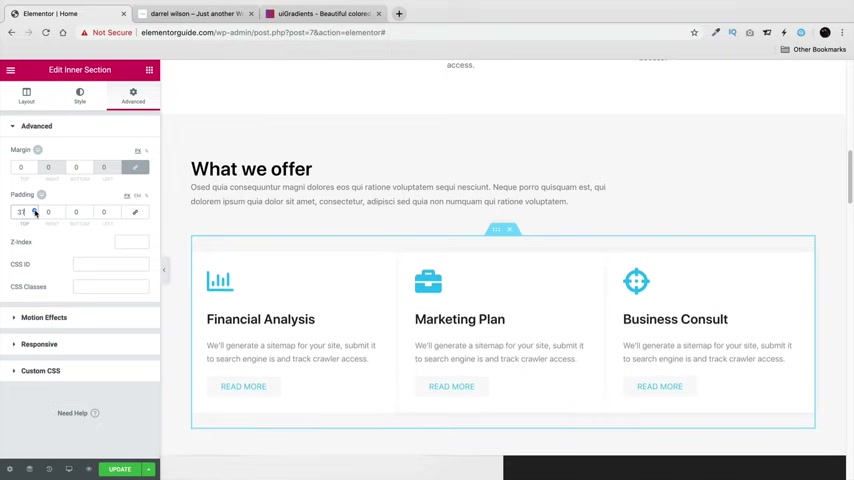
Now another thing I want to teach you all is about padding .
So uh padding is probably something that's probably you don't really use too much or you don't really understand on how to use .
So what padding and margin is is that it creates space so you can create space in between stuff because you know how do you make space between things ?
So right here , I'll click on this right here and under the advanced section , I wanna add some padding .
So I want space right here , right .
So right here under padding , I wanna go ahead and add in some padding to the top .
You see now how it's creating space between these .
So whenever you wanna add space between something , the padding is what you're going to use .
So let's go ahead and , and test something out right here .
Let's just say , for instance , um I want to add more uh padding .
I want to add more padding right here .
So right here , I'll click on this section , go to the advanced and now on the top section , I'll add padding .
You see that how we're pushing space .
So that's an example of how you can use padding and padding is very important .
It's a big part of learning , but just kind of just , just kind of think about how you want things structured and apply padding to where you want it to go .
So for instance , right here , I have too much space right here .
So I wanna go ahead and reduce the padding .
I don't want a lot of padding .
So what I'll do right here is I'll click on this row which controls this section under the advanced section , we can actually reduce the padding or I'm sorry , we can actually reduce the margin .
So right here , I'm gonna say I want this to actually start from a dirt a se a separate point .
You see that now how we're reducing the margin .
So margin is basically where it starts from .

That's what margin means in a nutshell padding means the space between something .
So margin is saying I want this to start minus 50 pixels .
So I want this section to start over here , you know , and you can create a lot of beautiful effects with margin uh with reduction of margin and everything .
So it scrolling down right here .
If you want to make changes to something , you'll put it right there , you'll edit it this section right here .
I'll click on this and I want to add in a gradient overlay the same one we had before .
So style click on this gray and overlay gradients and here we can go ahead and add in some gradients , something like that .
And the other section I had was uh what we had blue or something like that .
It was something like something like that .
You you guys get it .
It was oh This is on hover , sorry .
So right here , second color .
There , there you go .
Something like that right now for the hover option .
This means in fact , all your icons are gonna have the hover feature is when someone hovers over this , what do you want it to display ?
How do you want it to change the button ?
Right here has a style section and they have their normal and they have the hover now , right here , I'll change this to something like green .
Now , when I hover over this button , it's now going to change to green right there .
All right .
So you can kind of understand how that works .
So now let's go ahead and say , you know what ?
I don't want this section right here .
I want to get rid of this and I want to import a new section .
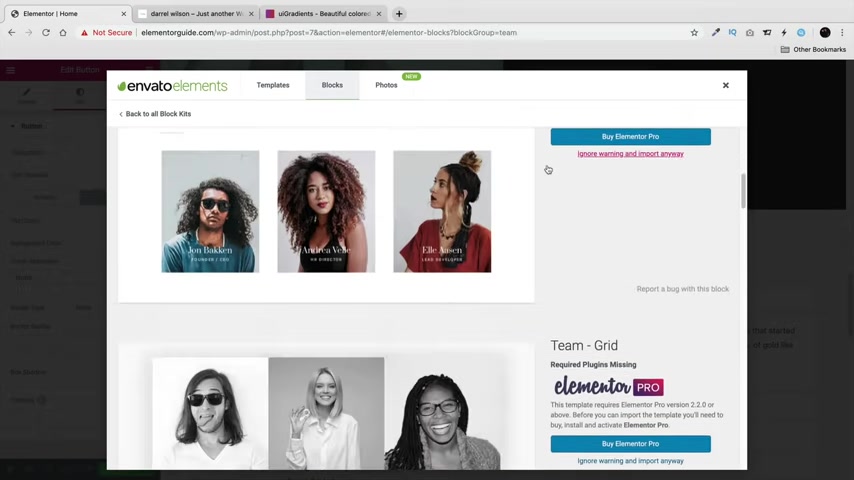
So right here under plus , we'll click on this right here and click on the blocks .
Now , what we'll do here is we'll look for templates .
So right here , I'll click on team .
We'll go ahead and scroll down right here .
Now , these right here we cannot use because this is part of their pro feature .
But I'll just go ahead and say , you know , I like this one right here .
So right here , add the block to page and it's going to now insert this section onto our websites .
And then again , we can go ahead and make changes , we can swap out the images , we can make any changes we want , et cetera .
So now that you guys kind of know how to design everything , let's go ahead and just keep scrolling down right here , scrolling down anything you want to change .
We can go ahead and go over here and we'll center this , we will center this and we will send this now whenever you want to add in a new section right here , click on this plus section and let's just say you don't want to use this .
You don't want to use the templates .
You don't want to use the blocks .
You can click on this plus icon .
Say , all right , I want to make my own section and I wanna make a three column .
So right here , I'll go ahead and take these and I'll just simply drag in an icon box and go back over here , I'll add in an icon and feel free to use your imagination here .
You know , you can put anything that you want on top of this , you can put it in a text editor , you can take this and take this right here and or let me see right here , take this and put it above essentially , it's the same thing .
So whatever you're trying to accomplish or achieve whatever works , you know , you don't have to use the modules the way they want them to use them .
It's all about creativity .
You can do anything that you want .
So right here , image box and then over here we'll add in something like social icons , et cetera .
So you kind of get an understanding of how this works and then you can kind of modify stuff .
So now I've shown you all how you can modify your website .
Let's go click on update right here and let's go ahead and exit this page and click on view page and see what we've done right here .
Now , the first thing you've noticed is that our header and our footer have disappeared , so we need to actually change something .
So right here under edit page , whenever you import a template , they actually have it to elements or canvas .
So right here on their page attributes under templates , you always want to make sure that it's elements are full width , click on update and now click view page and now you can see that we have our header back .
The reason why it's elements or canvas is because when you create this uh elements or canvas is actually an option to actually get rid of the theme customizer and then just have only the page builder .
So if you want to have your theme customizer , you can have it .
And if you don't want it , you can do the element or canvas , which will actually disable all of the theme functions and only have the page builder .
So right here , let's click on about us and let's go ahead and design this one right now .
So I'll click on edit page now right here , element or full width again , right here .
We'll change this to no sidebar content full with stretched and disable the title .
Make sure you have these settings always checked because this is actually the optimal way of building the sites .
And right here , click on edit with element or now right here again , click on the in here , corporate and business .
We'll go ahead and scroll down right here and then right here in the professional services , we'll click on that and I want the about us section now .
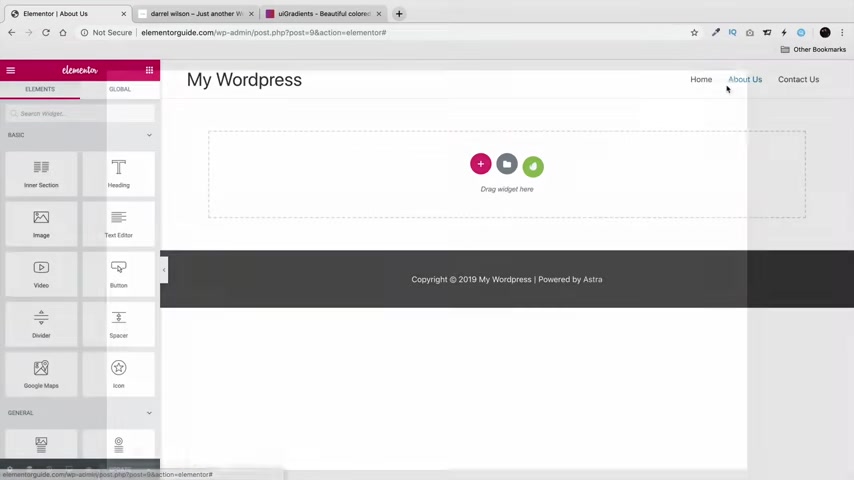
So right here , I'll go ahead and find the about us section and simply just click on import import templates .
All right , cool .
Now , we can also just go ahead and import the contact page as well .
So let's go ahead and find our contact us section .
So right here , contact us , import the template .
Now , this is importing it to our library so we can use it for later .
So right here , I'll close this and right here under this section , I'll click on the template , my templates and now we have the about a section .
So I'll click on insert and click on .
Yes .
All right , cool .
Now , uh these templates actually change the page to elementary canvas .
So you wanna make sure that it's elementary , full width right there .
And here I'll click on updates and now you can see that we have a full website that has already made for us and you can go ahead and make any changes that you want to it .
So now let's click on contact us right here or we'll actually have to close this really quick .
So view the page , click on contact us and let's do the same thing for this page right here and then I'll show you how you can set up a contact form on your website .
So right here again , I try to make sure you understand how to do this element .
You're full with customizer , no sidebar , stretched , disable the title and update .
Now , also right here , we can actually even have a transparent header for this page .
So let's just enable that really quickly .
Just to give you an example of what this theme can do .
Now , this options are here because this is the theme customizer .
This is what the theme is doing for us .
That's why we need the theme uh with this page builder .
So right here , click on edit with element to here .
I'll click on this my templates and we will go ahead and import the contact us section right here .
All right .
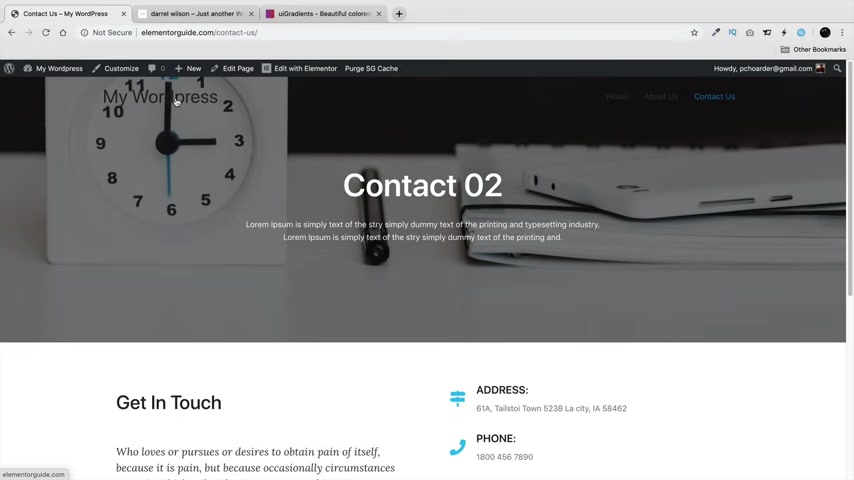
And again , make sure this page layout is set , two elements are full with .
Now , you can see here how this is now transparent .
So you can't see the white background behind it .
And also our logo is right there and don't worry about the logo .
I'll show you how to get one in just a bit after we talk about the theme customizer .
Now we need to install a contact form onto our website .
So when someone comes to our website and fills out our form , it'll go directly to your email .
So over here under wordpress code to dashboard and what we're gonna do now is we're going to install a plug in .
So right now plugins add new and over here you'll just type in , you can just type in contact form .
Now , there's various contact forms .
A lot of companies make a lot of different plugins .
The one I think is the best that works really well is WP forms right here .
So right here , click on install now and we're going to install this plug in .
All right , and click on , activates .
All right , cool .
So it activated the plug-in for us .
Now , right here it says uh create your first form .
Go ahead and click on this right here .
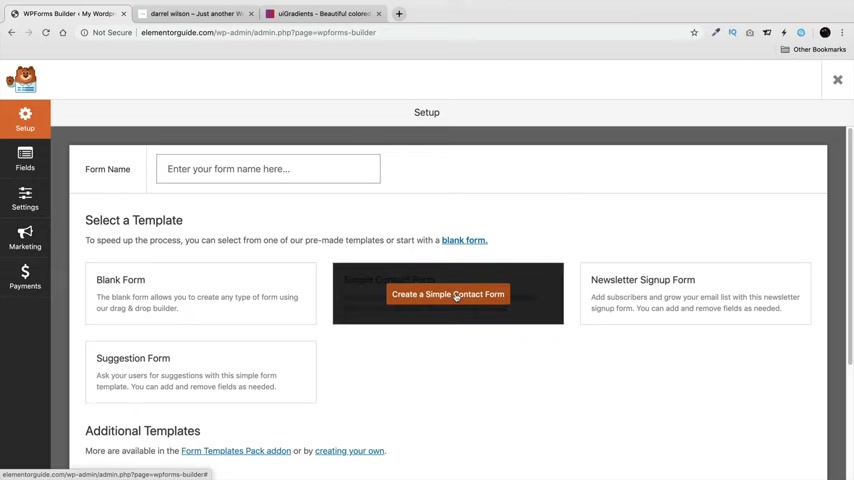
Now , go ahead and give your form a name right here or you can select from a template .
Uh Personally , I think selecting from a template is actually a little bit better .
Everything's made for you .
So let's do that .
So right here under a simple contact form , I'll click on this right here .
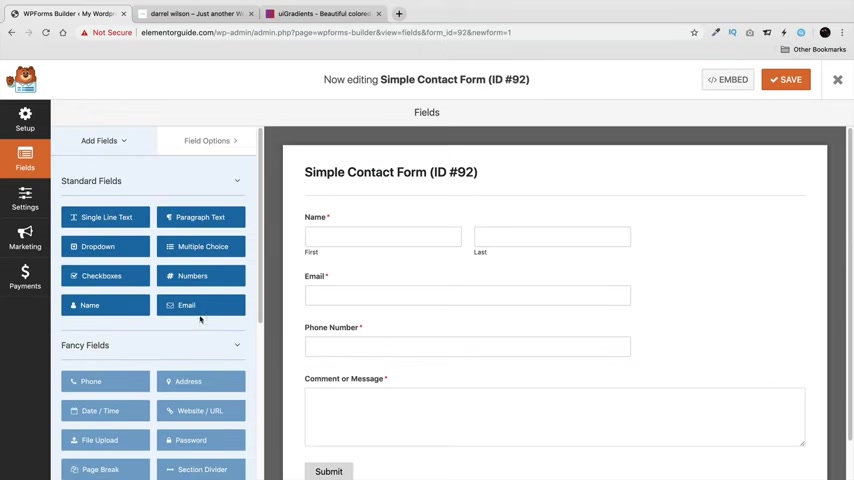
So here you can edit your contact form .
And let's say for instance , you want people to fill in like a phone number or something .
You can go right here under a single line text , just drag it right there .
And then right here you can put in something like phone number , phone number and make this a required section .
And once you're done , you'll click on save .
Now , there is a pro version to this as well .
So there are other things that you can add to this as well .
Uh I will have a link in the description of this video if you decide to purchase this .
Uh It's just a like a an add on for this contact form .
So if you want to have like a pass word or file upload or something like that , you can go ahead and put it on your contact form .
But uh for most of us getting started , you don't need that .
But for those of you who want to purchase it , there is a link below .
Now , once you've actually done all this , this is our contact form .
So go over here to settings .
Now , this options right here are just thing for like um you know , just , just for , you know , when something is sending , it's gonna say sending uh the submit button , et cetera .
So you can go ahead and change all this and you can kind of go through all this and check it out .
Uh Right here under setup , we can go ahead and go to our form .
Let's go ahead and do that .
So one more thing I want to do here is under settings right here .
Let me just make sure that this is going to your email right here .
So confirmation notifications .
Now , this is what you might want to change , but you might want to leave it .
So send to email address .
So where do you want this to send it to ?
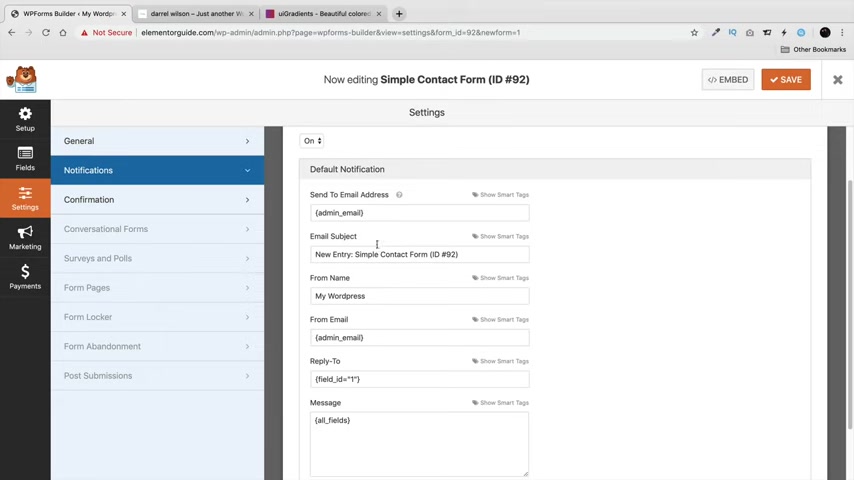
Now , by default , this plug-in is going to send it to the wordpress email address that you sent .
If you want to send to a different address , you can go ahead and put it right there .
All right .
So that's just a way of how you can change email addresses if you decide to do that .
But , um , that's , you know , that's your business .
I'm not gonna , you know , I'm not gonna uh get into that also when you get a contact or when someone fills out your contact form , what do you want it to say ?
So right here , you can put in like a new email from my website and click on save .
All right .
And right here , click on this X exits .
And right here now is the one that we have so simple contact form or I think it's this one right here .
We can click on preview right here to view it .
Oh , let's go back really quick .
I think that was , it was weird .
Yes , this one right here .
So let's go ahead and take this short code right here .
All right , we'll copy that .
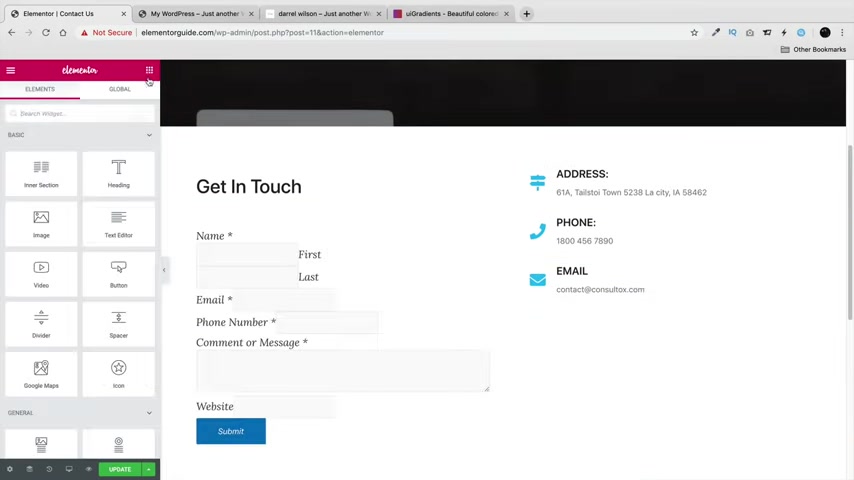
We'll go back to our uh we'll go back to our uh contact section and we'll go ahead and just paste it in there .
So for the contact us , just click on edit with element or now right here , we don't really need all this text so we can just go ahead and just get rid of all this .
And right here under the text section , just go ahead and paste that short code .
Now whenever you get a short code with wordpress , let's say you're using another plug in .
Uh what you can do here is just go to this right here .
Take any text editor , drag it anywhere you want and then under the text section right here , the text tab , just go ahead and paste any short code .
So let's say you get another plug in and it says paste the short code here .
Uh This is what they're talking about .
So whenever you get a short code from another plug in , you want to go ahead and you put it in a text editor , put it in the text section and then just paste it in there and you are all good to go , but I don't really need this because we already have this .
So here , I'll click on deletes and we'll click on updates now right here .
I wanna click on preview changes .
I want to see how this looks because this right here is actually kind of buggy but watch this preview changes and now you can see it looks much better , right ?
I don't know why it does that , but let's just let's just give this a quick little um Let's just try to see if this is working or not .
Let's just give this a test run .
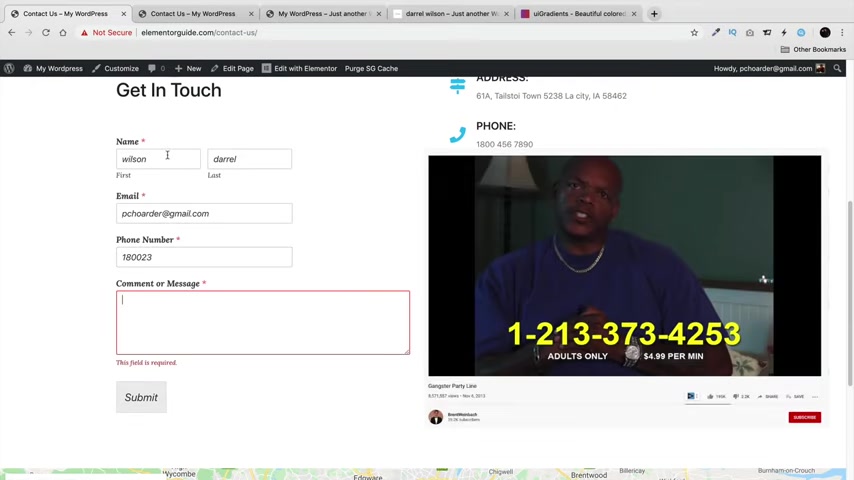
So right here under settings or I'm sorry , over here , I'll go to view the page and let's fill this out now .
So I'll just put Wilson Darryl .
I'll put in my email address right here .
I'll put in a fake phone number .
So 1 800 .
What's that one , that one thing on youtube , those guys at the , the , the talk crap hotline where like , if you're angry you can call them to like talk crap .
It's pretty funny .
It's , it's called Gangster Party hotline or something like that's really funny .
Hey , what's up here ?
I click on submits .
All right , cool .
So it sent it to our email .
Let's go ahead and check our email now to see if it's working .
All right .
So this is my email right here and you can see new email from my website .
I click on it and then right here you can see this is all looking good here .
I'll say , yeah , this is safe , of course .
So that's just , that's just gmail , but the message will display right here .
So we know your contact form is now working .
All right .
So congratulations .
You now have a contact form on your website and people can send you messages and it'll go directly to your email inbox .
So this stuff is pretty simple , right ?
It is .
So in this next section now that we've covered the page builder , I'm gonna talk to you about the theme customizer .
So the actual theme which is basically the wrapper around the page builder .
So I'm gonna cover all of that in this section .
So let's go back to the tutorial .
Now , when someone first visits your website , you're gonna notice they're brought to this probably blank page right here .
And this is where the theme customizer comes into play .
Right ?
So , right here we have this customized section .
Now , you can also get there going into your dashboard and clicking on , customize your website .
Now , this is basically what the theme is doing .
Now , this theme has a pro version and you can go ahead and purchase it .
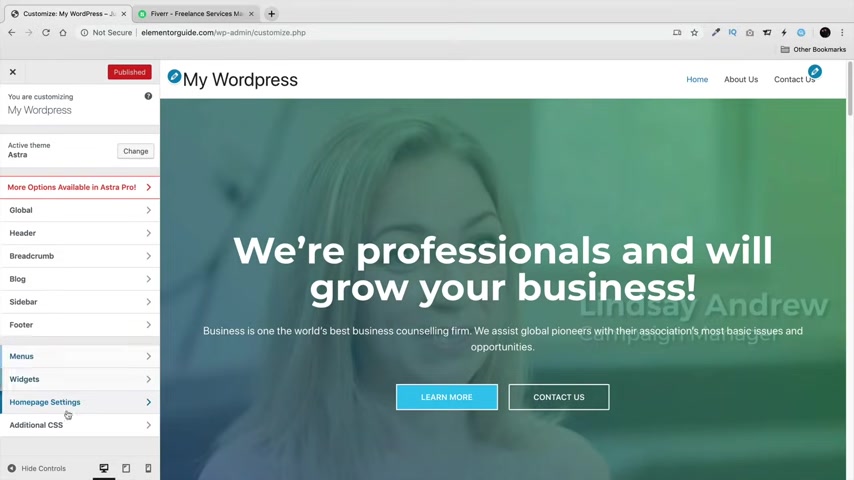
There is a link in the description below , but for most of us getting started , you don't really need the pro version just yet .
So the first thing you want to do right here is go to home page , go to a static page and change your home page to home right here .
Now , this is going to basically make it .
So whenever someone visits your website , it's then going to go to your home page .
So going back over here , we have different options .
So we have header , bread , crumbs , blog , sidebar , footer , all these options right here .
Let's just go through some of these to kind of make you understand what this is .
So right here is header now , site identity .
Now this is where we talked about a logo .
So if you have a logo , you can go ahead and put it right here by clicking on select logo and just go ahead and click on the logo and select its crop the image and then there you go , the logo will display right here .
And then also maybe right here .
I want to take off the side title , so I don't want the side title .
Take those off .
So now it's just her logo .
Now , if you need a logo , there's a link in the description of this video to fiver dot com guys .
This is where I got my logo from .
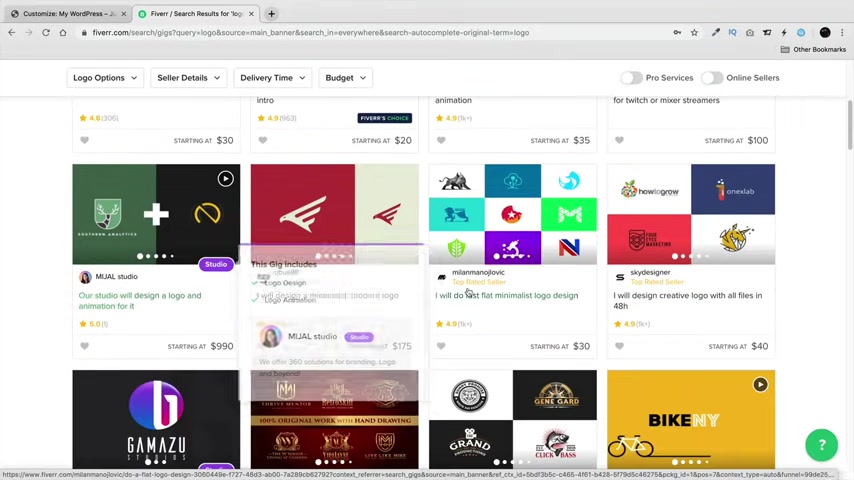
It's an amazing website .
I do have a 20% discount .
I'll put that coupon on the screen but just do something like logo , just type in logo , that's it .
And you'll find people that can make your logo for as little as $5 .
I mean , really , really cheap stuff .
And let's go ahead and scroll down right here .
Let's go see if we can find a $5 gig right here .
No , not $5 gig .
Let's change our budget right here to $5 and the max is $10 and let's take a look .
All right , much better .
So you can get a logo from one of these people right here and they can make you a really professional logo for your wordpress websites .
And again , you know , I got my logo from these guys .
They're really , really good .
And um once you actually , you know , make a partnership with someone , you can use them for something else like a , a background or something else .
Uh This is where you can outsource everything and find people from other countries that will make really quality good products for really , really cheap .
Now , let's just take a logo that I got from them .
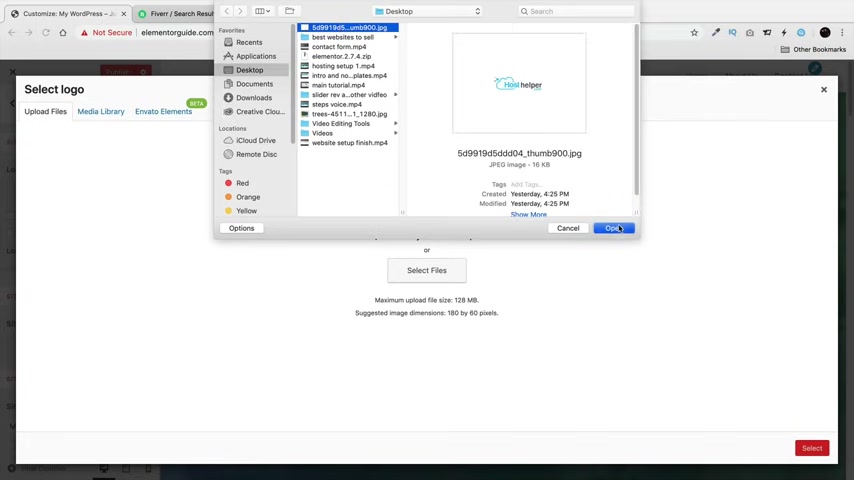
So right here and click on remove select logo , upload files , select files and I'll go ahead and use a logo that I got right here .
Host helper dot com .
This is a website that I'm currently working on right now .
So right here , I'll just say , uh I'll just produce this .
I want the logo just to show like that .
All right .
And there you go , crop the image .
So there is my logo and it's a little bit too big .
So I wanna make it just a little bit smaller and there you go .
So there is my logo on my websites now , also site icon .
So this right here is the site icon .
You go to a website and you see a little , little thing right there .
That's the site icon .
So I'll go ahead and put that as well for my website .
So now you can see up here how that displays and going down right here if you want to just have the actual letters , like , you know , you can spell out your website , you can have that as well or you can actually disable that .
So that's just what that does going down here .
Primary header .
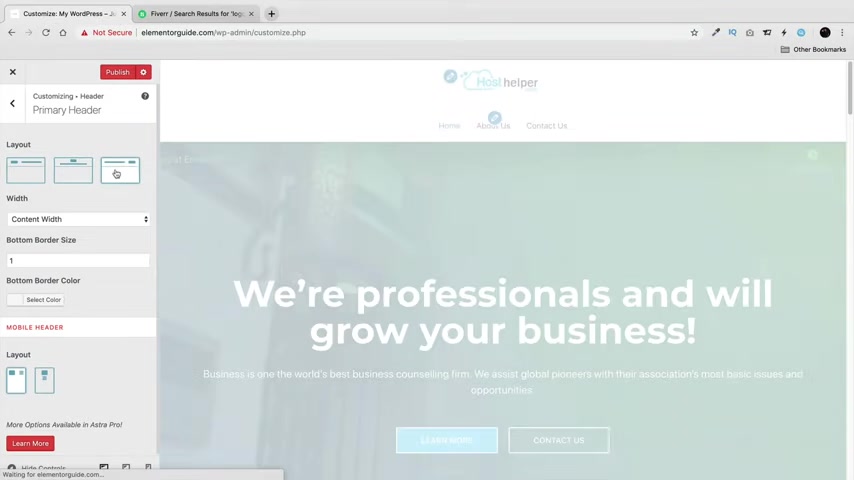
This is where you can change like the layout of your menu .
So you can see now how this is kind of adjusting and changing to uh any certain style .
Uh We can have this as full width or we can have it as content with um the bottom , the bottom border size .
You'll just go ahead and mess around with this .
You can kind of see what this does .
A lot of these settings , you'll understand what they do just by kind of messing around with it .
So you can see here now , has that black bar looks pretty neat .
It looks pretty sharp .
It looks pretty cool .
I like that .
Let's go back over here .
We can change our transparent menu to the entire website if we want it to .
So you can see now how it's transparent on the entire websites .
Um Going down here , we can change other options if you want to do that .
Remember this section is controlling the header .
So this is right here is called the header , this top section up here uh blog .
We're not gonna cover a blog .
It's basically how you can incorporate a blog on your website .
I have other tutorials on that .
But for right now , I think most of us just want a basic website um for the footer section .
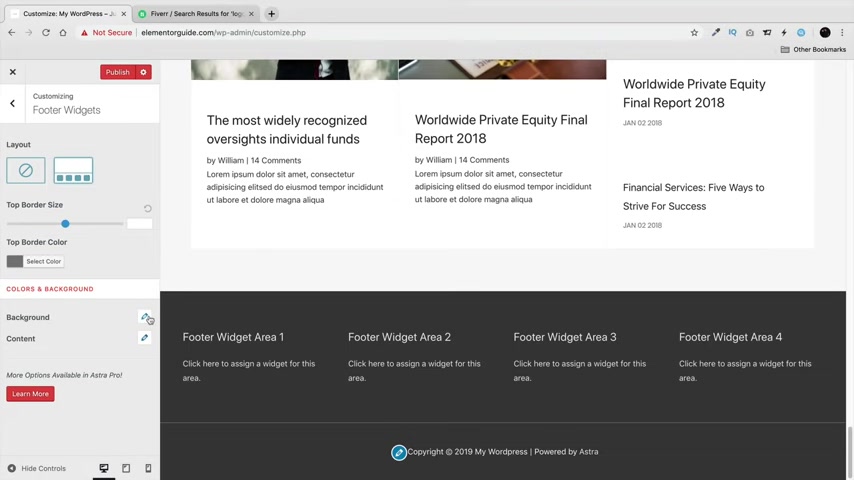
That's probably one of the most important ones right here .
So scrolling down right here is the footer section .
And right here , we have footer widgets and this right now will allow us to display widgets on our websites .
So , uh I just went ahead and I activated it so we can kind of go ahead and mess around with the background color and change stuff , et cetera .
So let's go ahead and uh do contents .
We can change the topography , the link color , et cetera .
So that's just a way on how you can design your footer .
And don't worry , we'll be talking about the footer of the last to make sure you understand what I'm talking about .
Uh menu , you get that uh widgets .
This is all controlling the footer area , uh CS S , most of you don't need CS S .
So just ignore that section .
Uh Let's go ahead now and design your footer .
This was the area we did not really talk about .
That's pretty important .
So let's go ahead and uh click on publish and click on clothes .
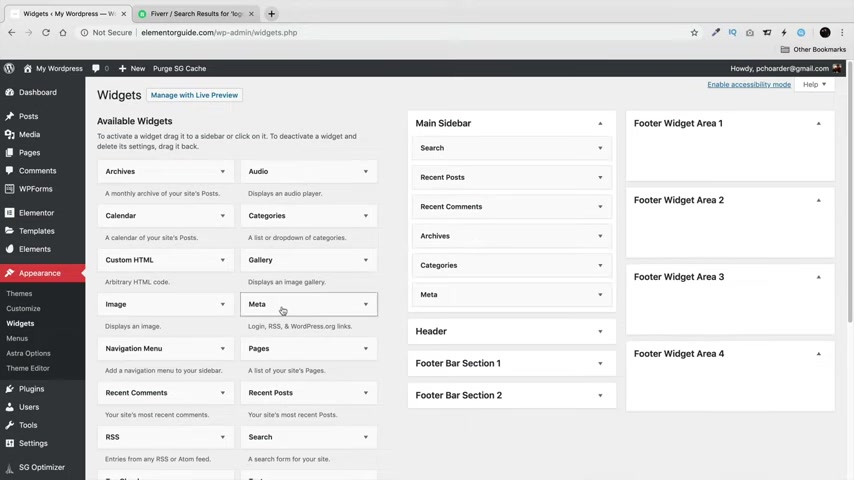
Now , let's go over here to our appearance and widgets .
Now , the footer widget right here is basically where you can add things to the footer .
So for example , you can go ahead and drag in a gallery image on your footer .
You can grab pages on your footer , et cetera .
Now , I'm just gonna click on save right here and let's just visit the website really quickly just to give you an example .
So you see here how we added pages and we added a gallery , but we didn't add any images .
So let's click on customize right here .
We can actually customize it from right here as well .
It would make more sense to customize it from here as well .
Let's scroll down to the bottom .
Go to footer foot or widgets .
Let's see .
Footer Bar , is it footer widgets ?
I think it is actually on the widget section right here .
There we go .
Widget area one .
So this is the gallery , but I want to remove this and I want to add a widget right here and I want to display just some text right here .
So text and I'll put like how we got started , how we got started and then over here , I'll just simply go ahead and copy this and paste it right there .
All right .
This section right here .
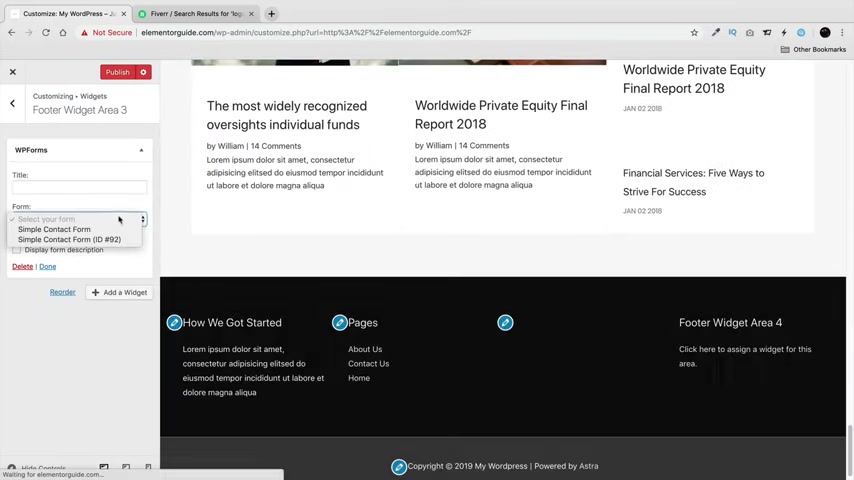
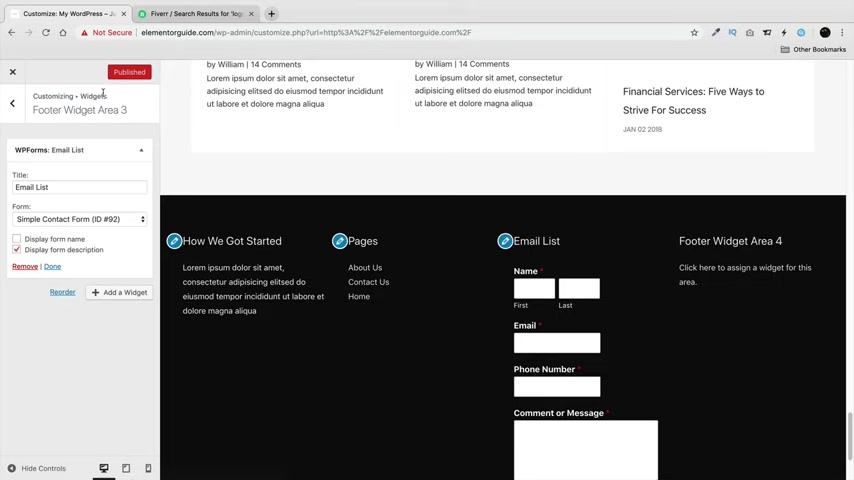
We have pages for area three .
We can add a widget .
Maybe we can even add in like a AWP form , the form plug in that we have , we can put a uh a form right here and we can use the form that we use from earlier .
So it's just another way on how people can , um you know , fill out a form if you want to do that or if you want to change it .
Of course , you might want to uh customize this and make it look a little bit better .
Maybe just having like your name and email and that's it , right .
Maybe even at the bottom , you can use WP forms to collect emails for email subscribers as well .
And then right here , you can do something like email lists or something like that , you know .
So now you know how to kind of use stuff , you can kind of go back and check it out .
Uh , but I'm just giving you an example .
Uh , now over here , what I want you to do is I want to install a plug-in that will give you the opportunity to have a Facebook like box .
So let's click , check this right here and we're gonna go to install a plug-in .
So , plugins add new .
I know many of you use Facebook all the time and they're addicted like my girlfriend , all she does is like , refresh the page and I'm like , dude , like you're sick , you know , like , like what is gonna change ?
What , what is so important with Facebook ?
It's these people out there .
It's like a , it's like a narcissistic like era where everyone's like , oh , I need the likes , I need the attention .
If I don't get it , I'm no good .
And it's , it's like , it's like , ok , you belong in the mental institution , you know , and I'll just take a gamble here .
I'll just , I'll just choose this developer maybe uh this one will be good .
So show me blogging like share box plug in .
Let's click on install now .
So what , what you want to do here is you kind of want to go through , find a high rated one and use that plug in and this goes for anything , guys , this goes for contact forms , this goes for virtually anything .
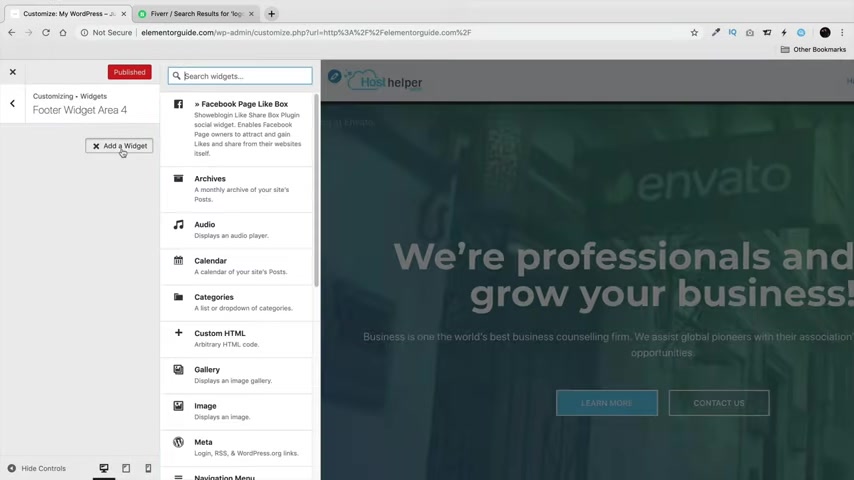
So let's go back over here to visit sites and go to customize and right here under widgets widget area four add a widget .
And now we have the Facebook page like box .
So let's go ahead and scroll down right here to make sure we can see what we're doing right here .
So right here , I'll just do like some like follow me .
And then right here , I think this is my Facebook uh Facebook , that's Darrell Wilson of three .
There we go .
There's my Facebook .
Cool .
And then right here , we can kind of change the width of everything .
So every plug in guys works differently .
You know , I'm not a professional with every plug-in because every plug-in works a specific way .
But what you can do here is you can kind of go through each plug in .
If you want to use this one , you can , you know , at this point it's trial and error , you know , I don't know what the best plug-in is out there because there's over like 50,000 of them .
But you get what I'm saying here , I'll just do something like 300 pixels .
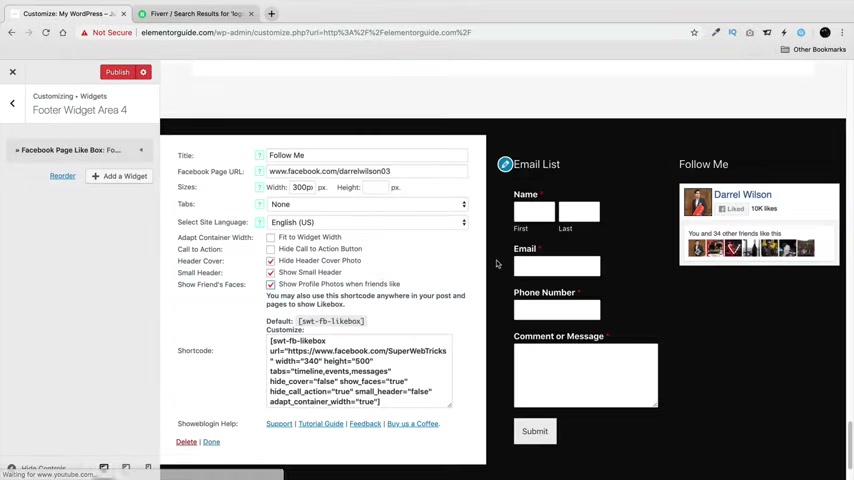
I want to show some things right here , show my profile photos when friends like it and you can kind of go ahead and , and mess around with that and you know , also go to my Facebook page , give it a like , you know , I just hit 10,000 likes .
Pretty excited stuff .
So , thanks .
Yeah , anyways uh here , I'll click on publish and uh that's that .
So now to show you guys how to , how to do that right there , let me just kind of give you all a general overview of everything in wordpress to make sure that you understand everything .
So this section is going to be talking more about like the miscellaneous setting .
So what does everything do for my website ?
So right here we have settings uh general .
This is basically like your time zone , your tagline , your site , URL your language , your date , your time , et cetera uh tools .
Right here is something where um it might be for like a developer or another platform , um site health .
This just shows like how your site's doing um appearance , you have themes .
Now remember there's other themes out there .
You don't have to use only astra , but I recommend to use Astra .
You can use this theme , hello element or theme .
You can use Ocean WP .
In fact , I have another tutorial where I talked about Ocean WVP and also astra as well .
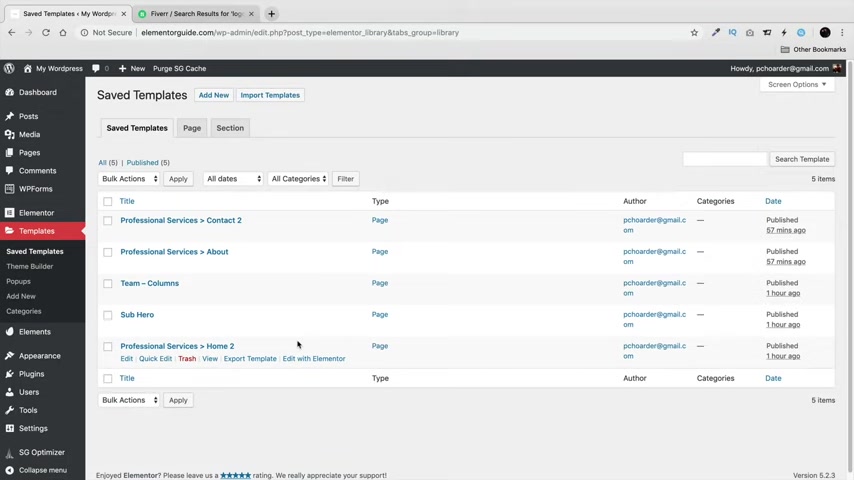
And over here you have templates .
These are the safe templates that we have in our library .
You can actually go through each template and edit them as well if you want to do that .
So what you can do is you can import a template , then you can modify it and then make changes to its uh right here pages .
So if you want to go ahead and add a new page , you can just click on .
Where did this come from ?
My Instagram feed demo ?
I have no idea where that came from .
That was weird .
Delete that , that , that's out of there .
That's gone , it's gone .
So whenever you want to make a page , just click on , add new , new page and then change all of the settings like right here and click on publish and then you can edit the element .
Or also if you want to delete the page , you can go over here to new page , click on trash , get rid of it .
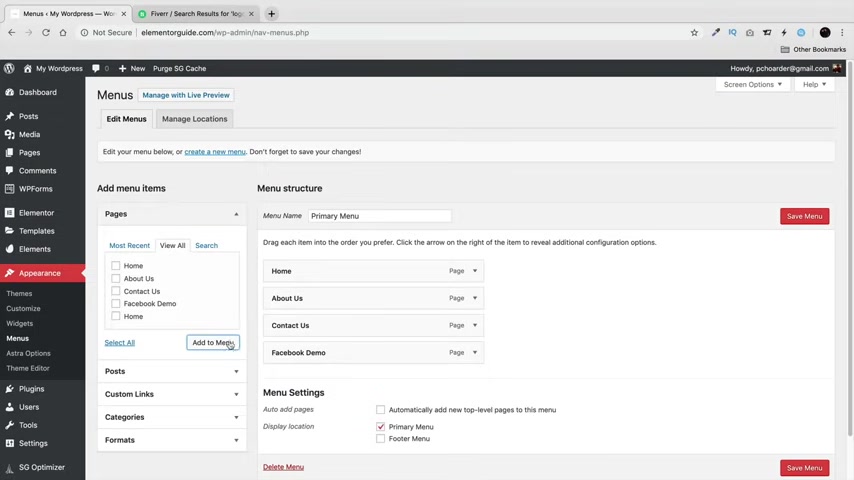
If you want to adjust the pages right here , you can go to appearance , go to menu and right here we have home about contact us .
I don't want to use this Facebook demo .
But whenever you have a new page , you want to go ahead and just click on that and then just put it right there .
So that's where you want a new page .
You can also have a dropdown menu as well .
So for example , if I want to have this random page or I don't know where it came from , I think it came from that plug in .
If someone knows in the comments , let me know , let me know where this page came from .
It's like the Wordpress Ghost came in my website uh right here in our visit sites .
Now , you see that we have this drop down menu and if someone clicks on this , they'll go to Facebook demo .
So I probably let's see .
This is a Facebook page created by the plug-in automatically .
Please do not delete to make the plug-in work properly .
Ok .
That makes more sense .
You know , I love the developers .
Give us little signals to let us let us know uh what is working and what's not .
Now over here in your plugins , click on add new .
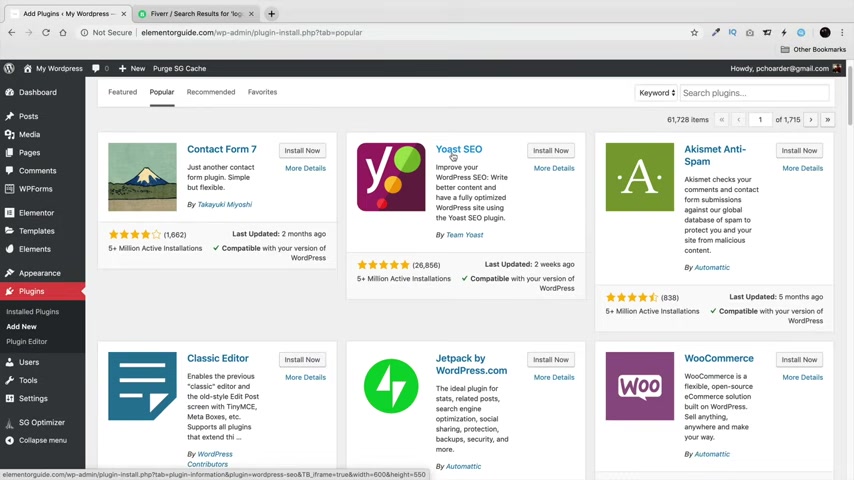
Now , there's a lot of popular plugins and I actually have tutorials on many of these plugins .
So Yost right here is a very powerful plug-in .
It will help your website get searched more on Google .
So make sure you have this installed and watch my tutorial on how to do that also right here .
Whoo commerce .
I will be making a Woocommerce tutorial with this same builder and this same theme and it'll teach you how to make an e-commerce website .
So if you want to watch that in the future , there will be a link below in this same video to check that out really quickly .
I'll just go ahead and show you how to make a blog .
It's really simple .
Let's go over here to page and we'll just go to blog right here and I'll just , well , I'll do you a favor .
This is the bonus section .
You guys are getting a bonus .
Now , usually people gotta pay for this .
You guys are getting it for free .
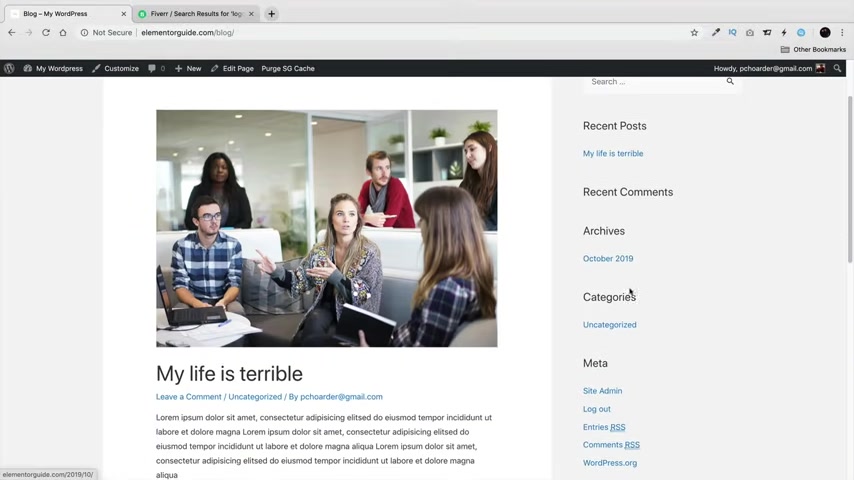
And right here under post , this is where you want to blog .
So post equals blog .
So um my life is terrible and then right here you can explain why .
So you can just say , you know , guys , my life is terrible .
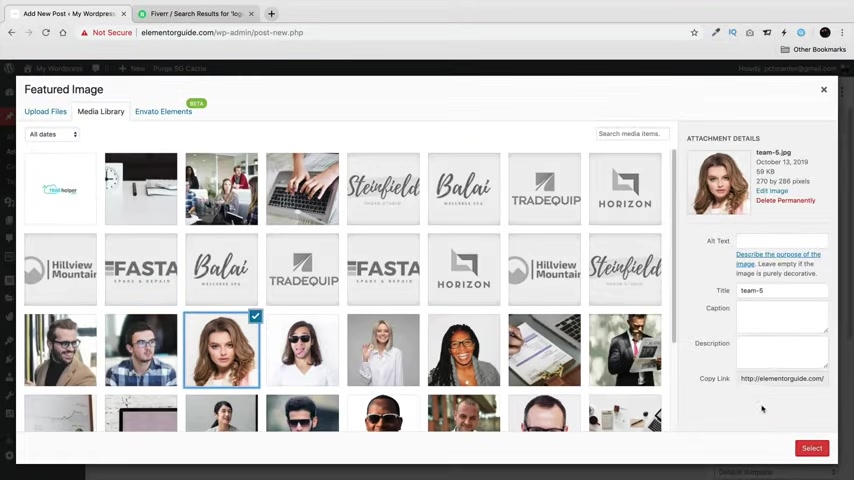
My girlfriend broke up with me , my dog doesn't like me , whatever you want to put right here , you can go ahead and put it and over here under documents under featured image , this is the image of the blog post .
So we'll put something like this girl right here or we'll put this , this girl right here , click on save and click on publish .
Now , we need to assign this post to a certain page .
So let's go ahead and do that .
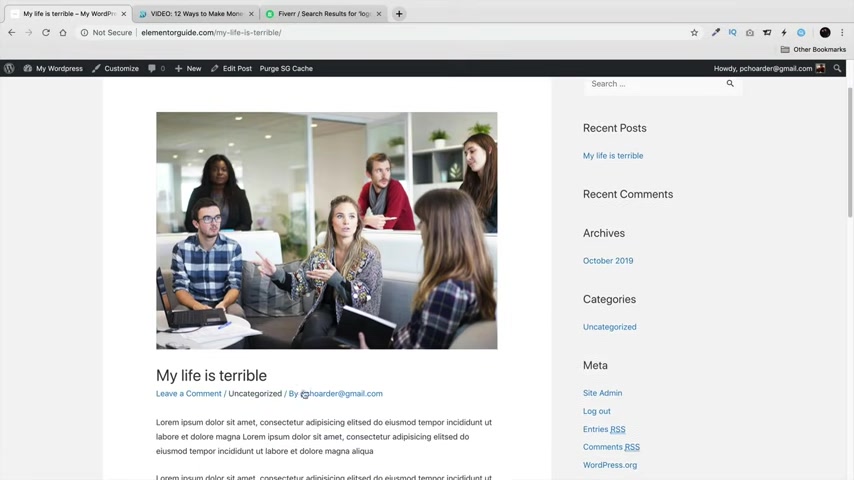
So we're over here , go to visit sites customize and now we're going to basically assign our blog to a certain page .
So right here on our home page posts , blog publish .
Did you get that ?
All right here , I'll close this .
So now we need to assign the blog to our menu .
So over here under dashboard , we'll go to appearance and go to menu and then blog add to menu and then adjust this to where you want it to go save menu , visit sites .
And now we have blog and now you can see that here is the blog .
Now , these right here are widgets .
So remember earlier how we had sidebar widgets , you can actually use any widget you want .
So on my website Darryl Wilson dot com , you can see I have widgets on my blog page .
So I'll just give you an example right here .
I'll go to my blog .
I hope that's running a little slow guys .
I know I'm actually on the process of changing it .
So these right here , I have social icons here , I have an image with an affiliate link and here I have a , a sign up form .
Now , this is actually called the , these are plugins right here are from elegant themes .
It's from actually another a competitor , uh a competitor company , but they make some really amazing plugins .
So you can see here how if someone clicks on this , it'll go directly to my Facebook page or something like that .
I have a tutorial on this as well .
Uh This right here , Bloom .
It's another plug-in that will basically collect emails and of course , I have another plug in or tutor on that as well .
And this right here , if someone clicks on it , they can read my blog post .
Now , this right here is all made with element to .
So this right here has the um the image we have these social shares and et cetera .
So you can kind of go through your blog post , click on it and then you can add the same thing .
So all you really need here is just some social icons .
You can go ahead and add some buttons , it there and then go ahead and talk about your life's problems , et cetera .
Now there is a pro version for this page builder , but quite honestly , the free version works great for you , but I will be having a second tutorial on how to use the pro version .
So if you do want to upgrade to the pro version , there is a link below to purchase it and I'll be having a second tutorial .
Basically , the the pro version , it adds a lot more functionality , has more features in the free version .
So I'll be covering that more in another video , right ?
But let's go back to the tutorial .
Now , in this next section , I want you guys to follow me here .
Um We're gonna talk more about the advanced features of this plug in and things this can do to make your site look a lot better and also some things like absolute positioning , et cetera .
Now , I want to show you all the shape dividers first .

So you might have noticed I have these shape dividers like this on my website and I'm just gonna show you how I added those on because this is included in the free version .
Now , right here , I'll click on these dots right here and all you need to do right here is go to advanced and I'm sorry style uh right here under shape divider , you now have the option for top and bottom .
So with top right here , you can see , I have different styles of the shape dividers .
Also , I can control the color of that as well .
Also , I can flip it and I can even change .
There you go flip and then even change the height of it as well .
So this is uh one feature that I didn't really cover too much in the tutorial because , um , you know , it's just , I , I didn't really feel there was a need before I kind of want to show you privately .
Now , this is a really amazing feature and you can just add some really cool stuff to your website .
Now , there's another really amazing feature about this plug in and it has to do with images and also other widgets that you can kind of mess around with .
Now right here , I'll click on this , this uh image right here .
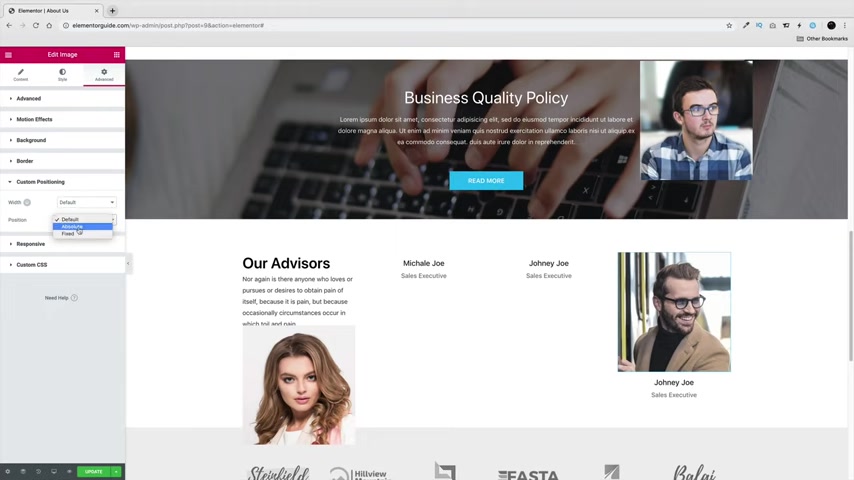
I'll go to the advanced section and I'll click on custom positioning now right here in the position .
I'll change this to something like absolute now with absolute .
What this allows me to do is take this image and virtually place it anywhere I want on the website and then click on update and save .
You can see here how I've moved these images around like this and then kind of just there you go .
Like now we have the images like that , you know .
So um this is just an amazing feature .
It allows you to really uh modify stuff really fast and change things .
But I will give you a warning that you should not be using this to make your website use this sparingly use this for something like small little images but do not design your website with this because you are gonna have tons and tons of optimization problems .
But now for most of us , you can kind of use this for something standard , you know .
So what I'm saying is use this sparingly .
Don't go crazy with it .
Don't be like , you know , don't be like this , you know , like don't do this if you want to do something like this , you know , this this can be a little bit better and then once you do this , you can optimize it for mobile .
OK ?
So this is just another amazing feature that I found with element here .
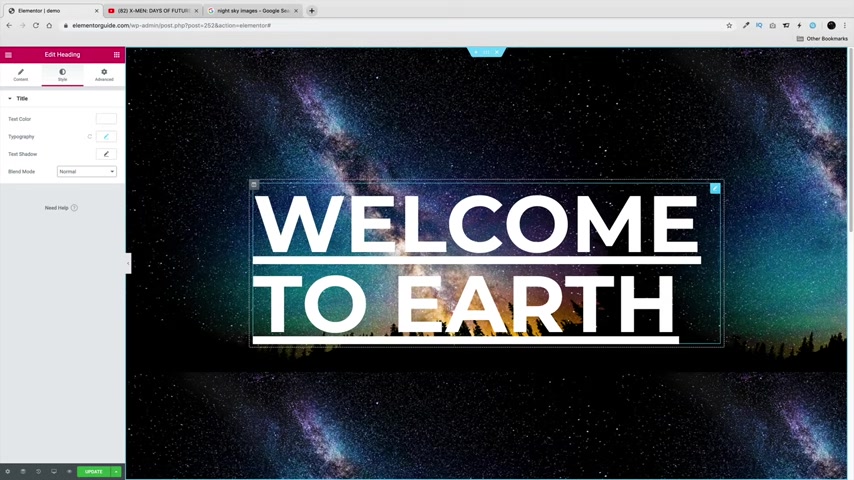
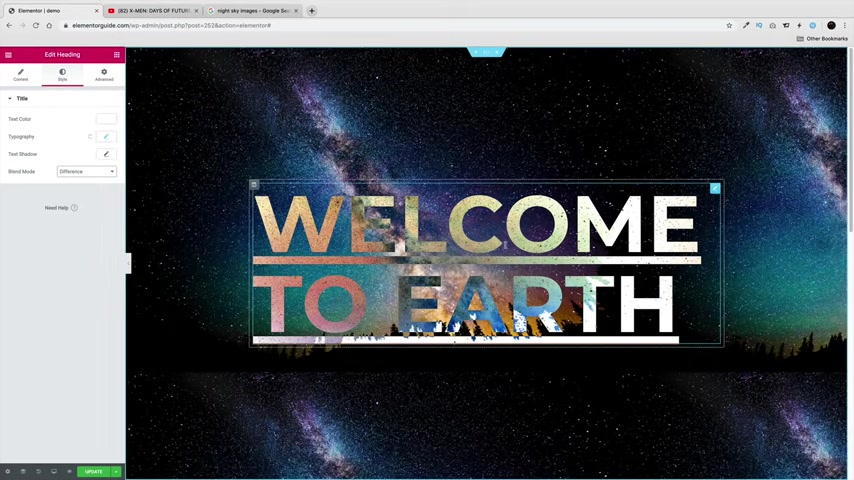
I'll click on updates next , let's talk about blend modes .
Next , we'll talk about blend modes .
Now , whenever you use a heading text , you have the option over here under style with blend mode .
Now what blend mode is that it basically allows you to add some different kind of blends to your current text .
Now , to be quite honest , I am not a professional of Photoshop .
So some of these , I don't know how they work , but you can kind of mess around with these and understand what they're trying to do .
So for example , right here , multiply not sure what that is screen .
OK ?
Overlay , here we go , here we go , overlay .
There you go .
So now you can see it has this effect right here and you kind of just go through a lot of these and see what they do uh light in dull or color dodge it looks like right here .
It's like uh kind of like having this effect right here .
This might be for like retro or something like that .
A saturation , you can see the text is kind of blended in in the back , but it's very saturated uh color , not sure difference .
There you go .
That has a really cool feature .
And also right here , exclusion uh Hugh and Lumosity .
Now , let's go over here .
Uh The one I feel is probably the best one is probably uh overlay and also um exclusion as well .
But depending on the background , depending on what image in the back and what color text you have , it'll achieve a certain style .
So just kind of go through the saturations and the blood modes and see if you can come up with something creative .
They do have a tutorial on the elementary channel .
But to be honest , it's very limited .
It talks maybe about maybe one or two of the blend modes because there's just so many different ways on how you can achieve blend mode .
So um go ahead and mess around with the blend mode , see if you can come up with something creative .
But this again is just an amazing feature that comes with the elementary page builder .
Next , I want to talk to you about mobile optimization .
Now , this is extremely important because you have more mobile visitors than you do have desktop users as of 2018 , which was last year .
So in this section , I'm gonna show you how to optimize your website for the tablet and also for the mobile device .
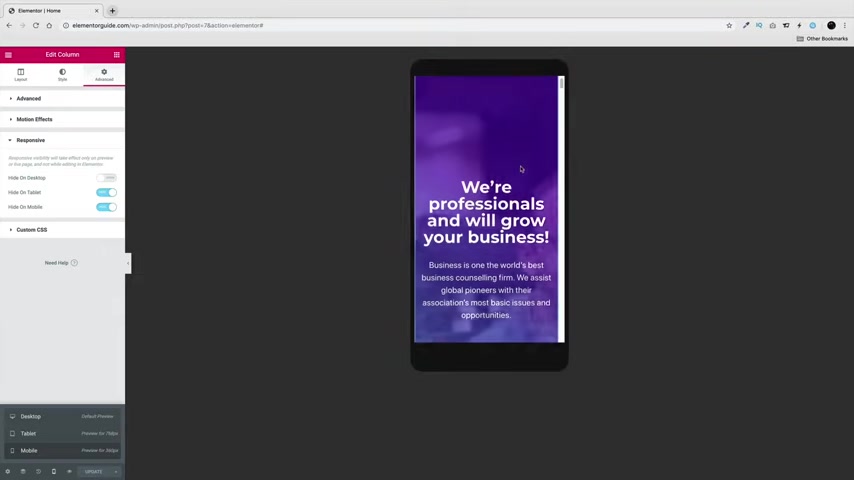
So over here I have the builder activated now on the bottom left , right here , we see responsive mode .
I hope you guys don't mind .
I made my screen bigger two K to give you all a bigger understanding and just so you can see everything right here .
We have responsive mode , click on this and click on tablets .
Now you can actually make changes to anything on the tablets .
So scrolling down right here , you can see that this actually looks pretty mobile optimized already .
If there's something that you want to change , you would click on this and then make a change .
You see how right here this button , how it has that blue symbol on it .
That means right now this is being modified for people visiting your tablet only on the tablet or wait .
Did I say that ?
Right ?
Yeah , visiting your website only on the tablet .
All right .
So scroll down right here .
Now there's some sections that you might not need .
You know , maybe you don't want to have everything on this website like uh maybe you don't want to have this guy on on your site , right ?
And you're like , you know what , I just don't need this guy right now .
He's just not popular .
What you can do here is edit the column , go to advanced , you can go to responsive and you can disable this on tablet and mobile .
So now this section right here will not display for people who are visiting your website on a tablet or a mobile device .
Same thing right here .
Maybe we don't need this image .
There's this image is useless , right ?
So let's just get rid of it .
So right here , I'll click on this advance responsive hide on uh tablet and hide on mobile scrolling down right here .
Is there anything that you want to change ?
This is where you're gonna do it .
And it's pretty important actually to make sure that everything looks perfect on mobile because again , there are more mobile users than there are desktop users .
So this is really , really important guys .
And actually Google will actually rank your website better if your site is more mobile friendly , click on updates .
Now , let's go ahead and change this responsive mode to the mobile .
All right , let's let's go back up to the top now this direction right here .
I mean , we don't really even need this button .
What we can do here is maybe we can center it or we can even go to advance and we can just get rid of this button altogether .
If , if we don't need it .
So I already have it on hide on tablet and mobile .
But if you want to actually display it like this , it'll now display or you can actually just hide it and only have one button plus this stack button looks kind of ugly .
Right .
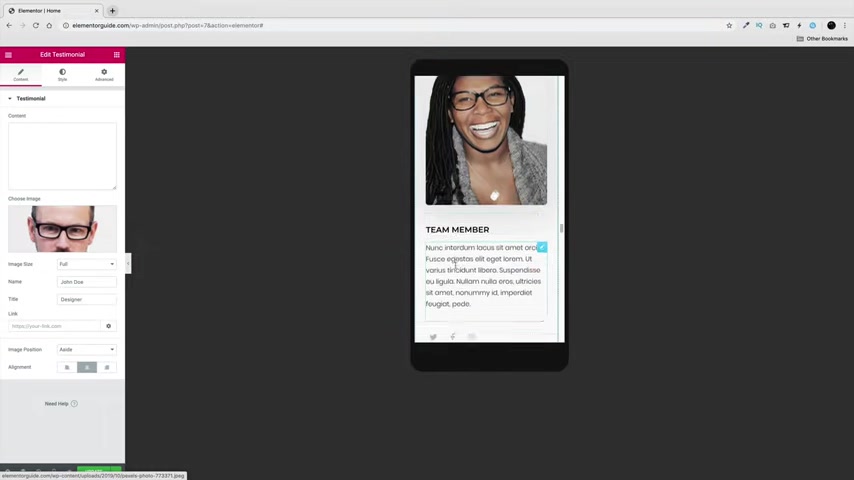
Right down right here .
Everything looks good .
Now again , you can always center this , you know , you can actually center this line , that'll be a little bit more optimized , right ?
So you can actually position this to be a little bit more centered .
Um Not that important .
Uh Over here again , the same thing you can actually go to style and you can actually center this as well .
Uh It's going down here .
Uh We don't need this , but this is actually already disabled .
So for the advanced member , we disable this section for mobile , maybe this section right here , we can actually center this and center this for our mobile users and also center this as well for our mobile users .
It's going down here and it looks like everything else is pretty much uh adequate .
Everything looks good .
Maybe we don't need , maybe we don't even need this whole section right here .
This , this our , our company , we can actually get rid of that or we can actually just get rid of this this gallery advance .
We can just go ahead and responsive and get rid of this gallery altogether .
We don't really need it .
Maybe we just need the text right there .
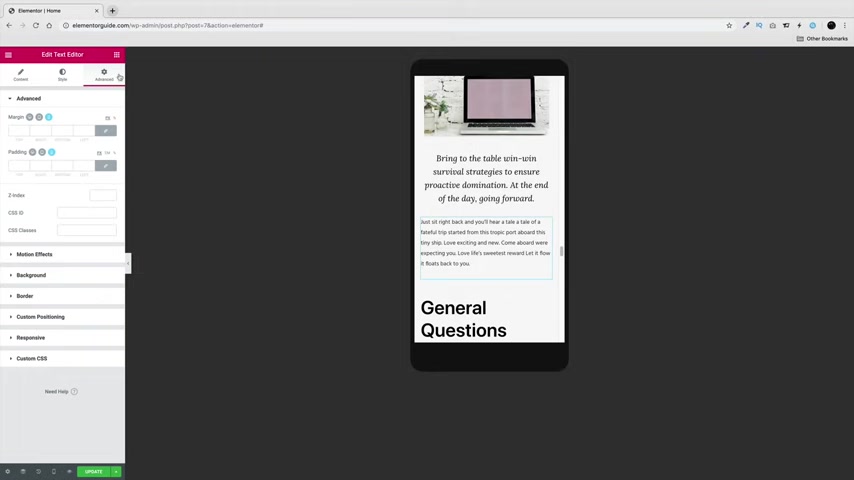
So I'm just trying to make you understand on how you can optimize your website for the mobile devices .
It's very important that you do this after you make a website because um your website will actually start to rank lower if Google thinks that your site is not mobile responsive , but uh it looks like by default that the template that we use already made this pretty mobile responsive .
I don't really see any letters that are clumped together .
Let's just click on update right here and let's go to the contact Us page and see if we can find something that just looks like crap .
Let's just let's just see if we can find something that just looks terrible .
You know that we can actually uh have a note that's saying OK , this looks bad uh responsive mode and click on contact , scrolling down .
Everything looks pretty mobile optimized here .
But if you see something like like for example , right here , I'll just give you an example of what not , what not mobile optimized is .
I'll just click on this right here content or style topography and the size .
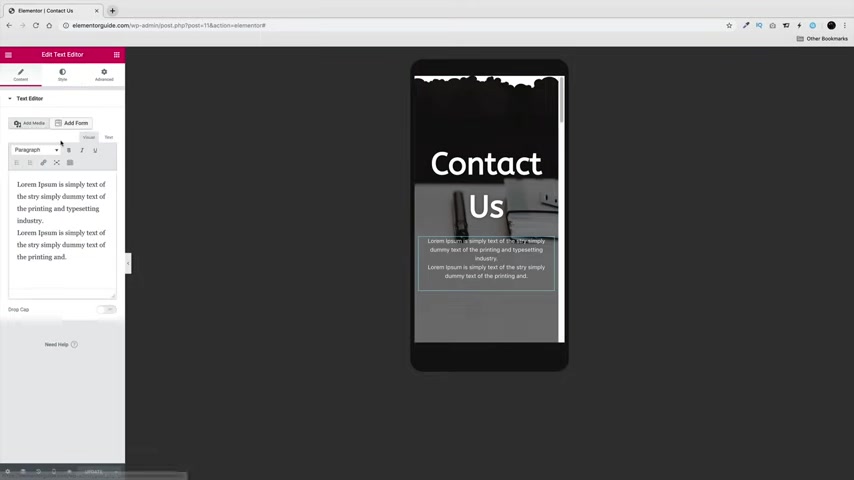
Now , if you see something like that right there , this obviously right here is not mobile responsive , it does not look friendly on the mobile device .
You need to make sure the text is smaller .
So something like this right here would be more practical , right ?
So that's an example of something when you see something that's not mobile optimized .
Uh usually has to deal with something like big text or with a letter would actually overlap and go on the bottom .
But um just go through your website , make sure it's fully optimized .
And uh again , it's very important .
So , yeah , make sure your site is mobile optimized .
Um Very important .
Let's go on to the next section .
Next .
What we're gonna do is we're gonna put an SSL on your website .
Now , on the top left , right here , you've noticed throughout this whole tutorial , this says not secure .
Now anyone coming to your website is going to be given a warning by Google saying this could be a scam website or something crazy like that .
But it's really not .
We just need to install the SSL on our website .
So let's go over here to dashboard and we're going to install a plug-in .
So over here plugins , add new plugins become really useful guys .
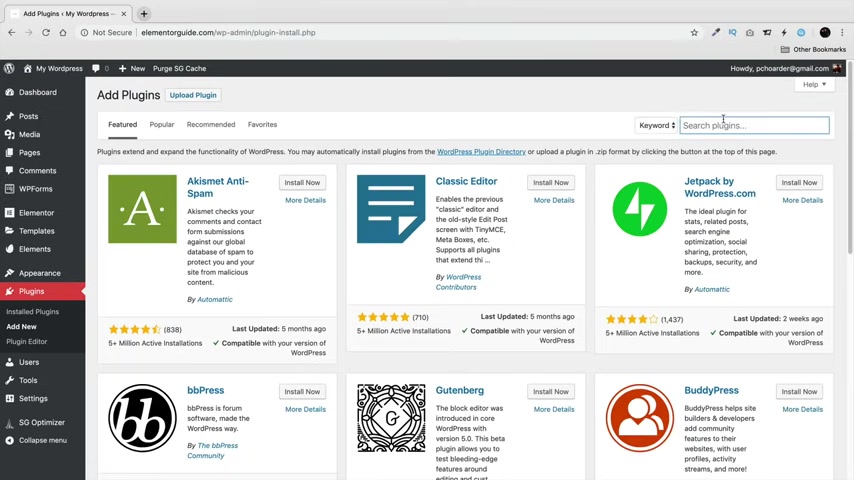
I mean , if you have to do this by code , it would take you like a long , long time .
So right here type in really simple SSL .
All right .
And right here , click on install now .
Now also make sure that you have your wordpress user name and your password written down somewhere because when you activate this plug in , it's gonna kick you out of wordpress , ok ?
So just make sure that you have it written down somewhere .
So you don't email me back and say , hey , I got logged out on my website .
I don't know how to get back in et cetera right here .
Click on , activate .
All right .
Now , right here it says , go ahead and activate the SSL .
So go ahead and click on , go ahead and activate SSL .
And then right here , just click on visit website .
And now on the top left , you see that that's gone right now .
So right here , let's go ahead and just go to dash WP dash admin and let's re log in and you know , it's right here on the top left now , how it says connection is secure .
So now your website is fully secure and people won't give warnings saying that your site is a scam or anything like that .
So , uh that's how you install the SSL on your website .
So that's basically the entire tutorial guys .
Um I've showed you how to make pages .
I've showed you how to modify stuff .
Now , there is a pro version to element to .
So this page builder , let's go ahead and go ahead and check out really quick here .
I'll just go to visit sites and go to mentor .
This actually has a pro version .
Now , there's a lot more you can do in the pro version and I'll be talking about that and making a separate video about the pro version .
It has some really amazing features if you want to support me .
Um There is a link below to purchase Elementary Pro and um basically I make money through Philly commission .
So it helps me continue to make these tutorials for free .
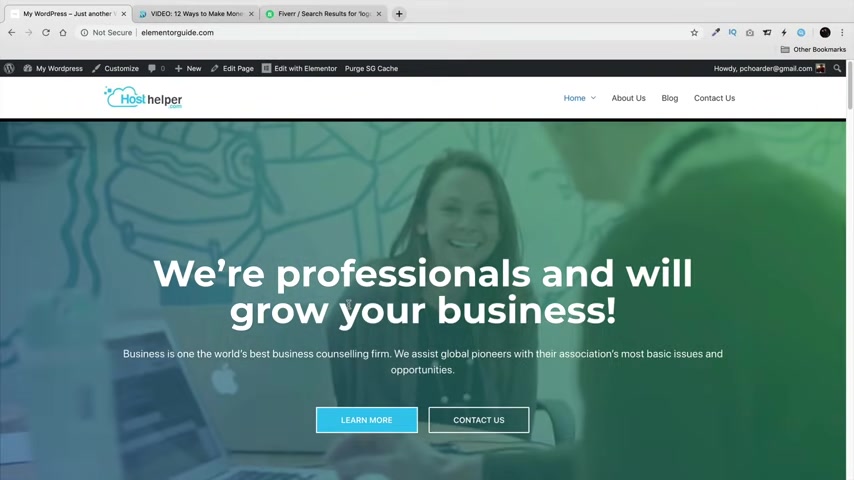
But I will be having a full tutorial elements or pro they have some amazing features including a theme builder , a Woocommerce builder .
Just tons of really amazing features .
So um make sure to check that out also be having a woocommerce tutorial e-commerce tutorial as well with this same builder .
So that's it for this tutorial guys .
Uh Hopefully by now , you know how to design your website .
I think we covered everything we covered .
Uh the contact form , we covered mobile optimization .
I showed you how to incorporate a blog .
I showed you how to create different pages .
I've showed you about plugins and how to create a header and also a footer for your wordpress website .
Again , guys , make sure to like this video .
I really , really appreciate it .
I wish you all the best of luck and good luck on your new websites .
So I told you guys that was really easy , right ?
I mean , literally we got our domain imported a template , modified , it changed the images and now you have the website that you want .
So uh congratulations on your new website .
Also , I will be having two fault tutorials for this one .

So I'll be showing you how to use the pro version .
And also for those of you who want to sell something , I will be having another tutorial on how to make an e-commerce website with this same page builder .
So make sure not to miss it .
My name is Darrell Wilson .
I hope you enjoyed this video and I will see you guys in the next video and enjoy your new website .
Are you looking for a way to reach a wider audience and get more views on your videos?
Our innovative video to text transcribing service can help you do just that.
We provide accurate transcriptions of your videos along with visual content that will help you attract new viewers and keep them engaged. Plus, our data analytics and ad campaign tools can help you monetize your content and maximize your revenue.
Let's partner up and take your video content to the next level!
Contact us today to learn more.